

Prepare the source-development environment locally, then use the verified Docker Compose entry point for controlled remote access
tick-stock-panel is a self-hosted A-share stock selection, monitoring, analysis, and backtesting workspace with a React frontend and FastAPI backend. This guide explains how to prepare its native development prerequisites, use the repository-provided development scripts, run the integrated Docker Compose build, verify the application locally, and connect the Compose HTTP endpoint through Localtonet. The repository evidence available for this revision does not establish a supported public topology for the split Vite and FastAPI development services, so we do not present port 3011 as a complete remote application. Remote access in this guide targets the integrated Compose service on port 3018 after local verification.
📋 What's in this guide
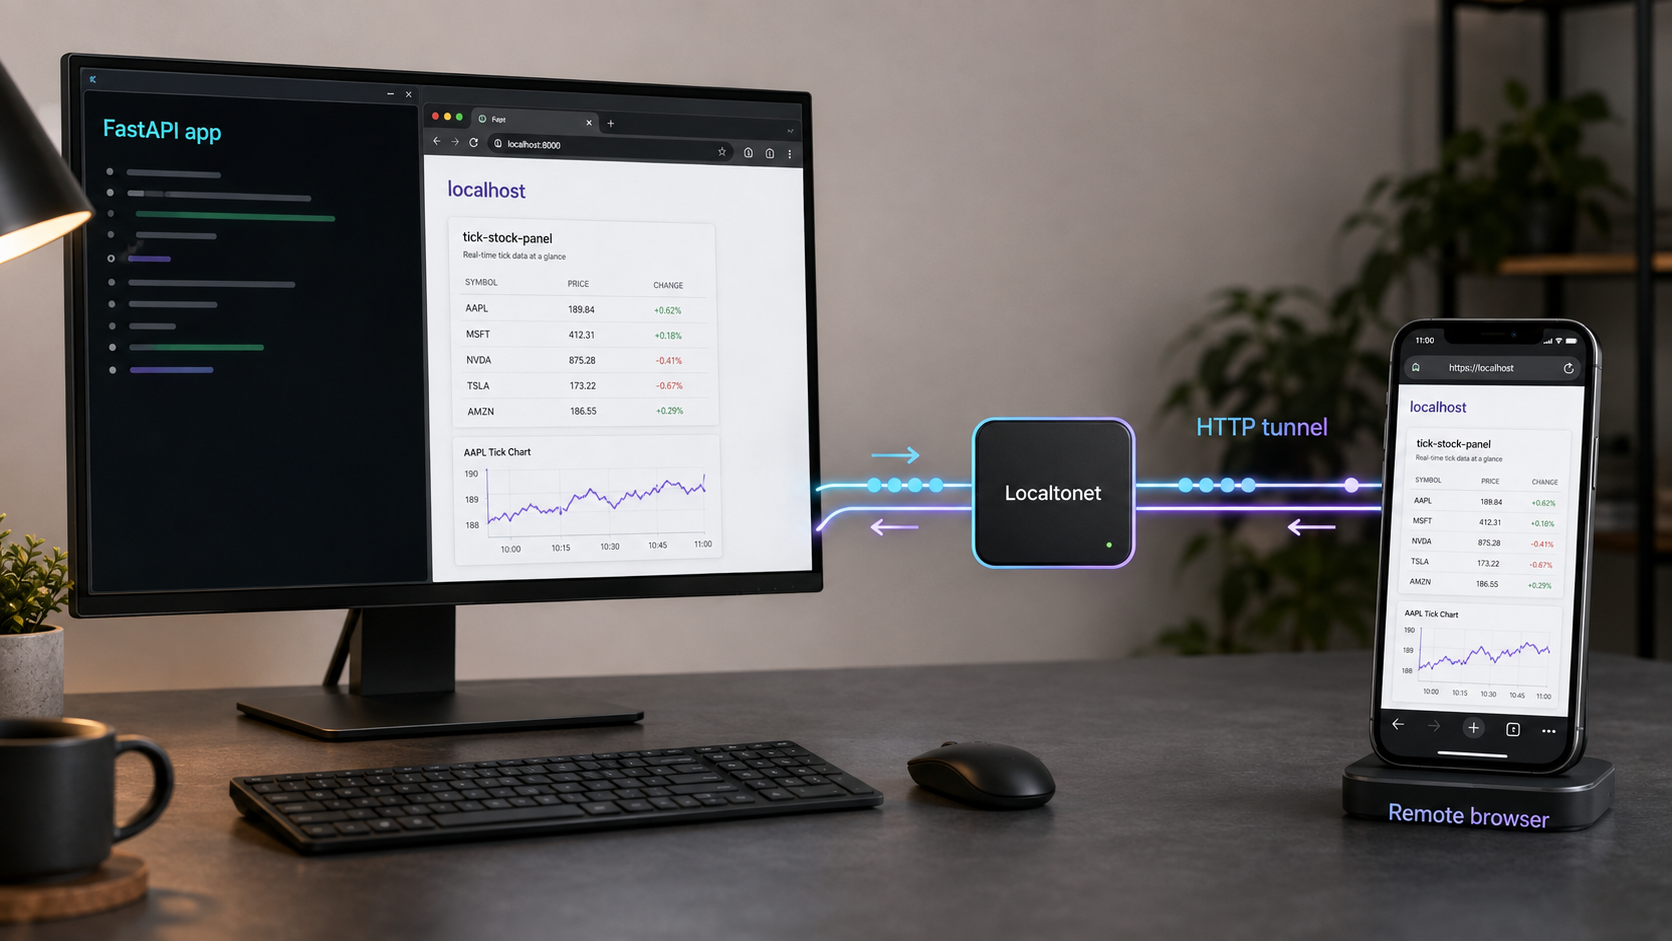
What this guide supports and what it does not assume
tick-stock-panel, also identified as TSP in its repository, describes itself as a self-hosted quantitative workspace for Chinese A-share stock selection, monitoring, analysis, and backtesting. Its published architecture separates a React 18 presentation layer from a FastAPI application layer. The broader stack includes REST endpoints, server-sent events, Polars-based computation, Parquet storage, DuckDB, scheduled tasks, data-source plugins, research tools, and optional AI-assisted capabilities.
The repository presents two distinct ways to work with the application. Native development mode runs the frontend and backend as separate services so contributors can edit and debug their code. The documented addresses used by the existing setup are http://localhost:3011 for the frontend development server and http://localhost:3018 for the FastAPI backend. Docker Compose builds an integrated application whose browser entry point is http://localhost:3018.
These modes are not interchangeable. A Vite development server can apply host checks, proxy rules, origin handling, and hot-reload connection settings that differ from a built frontend. The browser may also need to reach the backend through a configured proxy or a separate origin. FastAPI can independently apply CORS policy, trusted-host checks, authentication, and streaming behavior. Server-sent events remain ordinary long-lived HTTP responses, but they still depend on the browser using the right public origin and API path.
The supplied repository extract confirms that files such as dev.sh, dev.ps1, .env.example, Dockerfile, and docker-compose.yml exist. It does not include their current contents. It therefore does not provide enough evidence to state the exact Vite proxy target, accepted hostnames, CORS origins, SSE URL construction, Compose mount paths, or every action performed by the development scripts. Rather than inventing those details, this guide keeps the split development stack local and uses the integrated Compose endpoint for the Localtonet workflow.
This is a development setup guide and a Compose remote-access guide. It does not claim that tunneling port 3011 alone produces a supported remote development environment. Before publishing a split development stack, inspect the current Vite configuration, frontend API client, backend CORS and trusted-host middleware, SSE route construction, and hot-reload settings. Those source details were not included in the evidence available for this revision.
http://localhost:3018.
The current repository README says the project is maintained primarily as a personal open-source project for learning and research. It also says the project is not investment software, market-quotation software, an AI stock-recommendation product, or a price-limit prediction product. The supplied evidence does not include the text of the current LICENSE file, so this article does not claim a separate blanket prohibition on commercial use. Read the actual license, repository notices, third-party data terms, and applicable financial-data rules before deciding how the software may be used.
Install the prerequisites on a clean host
Choose the native development path or the Docker Compose path before installing tools. Native development requires Git, Python 3.11 or newer, Node.js 20 or newer, uv, and pnpm. The container path requires Git plus a Docker installation that provides the docker compose subcommand. You do not need to install every native runtime if you intend to use only Compose.
Install Git
Install Git using your operating system's supported package manager or the official Git installer. On Windows, use the regular Git for Windows installation and allow it to provide the git command to your terminal. On macOS, Git can be supplied by the command-line developer tools or a package manager. Linux distributions normally provide Git through their package repositories.
Open a new terminal after installation and verify it:
git --versionInstall Python 3.11 or newer
Install a supported Python 3 release from your operating system's package channel or the official Python distribution. On Windows, make sure the installer makes Python available to the user account that will run tick-stock-panel. On macOS or Linux, do not replace a system-managed Python interpreter merely to satisfy this project. Install a separate current interpreter when the operating system depends on its own Python version.
Verify the interpreter in the terminal you will use for development:
python --version
Some macOS and Linux installations expose Python 3 as python3:
python3 --versionContinue only if the resolved interpreter is Python 3.11 or newer. If the command reports an older version, inspect the executable search path instead of assuming the newly installed interpreter is active.
Install Node.js 20 or newer
Install Node.js 20 or a newer version supported by the current project. An official installer, an operating-system package, or a version manager can provide Node.js. A version manager is particularly useful on a development workstation because it allows this repository to use an appropriate Node release without changing unrelated projects.
Confirm both Node.js and its bundled npm client:
node --version
npm --version
The Node.js result must be version 20 or newer. Restart the terminal if it still resolves an installation that was removed or upgraded.
Install uv
uv manages the Python environment and dependencies used by the native workflow. If the Python installation provides pip, one supported installation route is:
python -m pip install --user uv
When the host uses python3, use the matching interpreter:
python3 -m pip install --user uvOpen a new terminal if the user-level executable directory was added to the path during installation, then verify:
uv --versionIf the command remains unavailable, inspect the location reported by pip and add the appropriate user executable directory through the normal operating-system process. Do not run the project with elevated privileges simply to work around a user-path problem.
Install pnpm
After Node.js and npm work, install pnpm for the same user account:
npm install --global pnpmConfirm that the command resolves:
pnpm --versionKeep the project's lockfiles intact. Do not replace pnpm with npm or another package manager unless the repository explicitly documents that alternative, because different package managers can resolve dependencies differently.
Install Docker for the Compose path
Install a current Docker environment appropriate for the host. On desktop operating systems, ensure its engine is running. On Linux, ensure the account used for this tutorial can access the Docker engine under the host's approved security policy.
Verify the client and Compose plugin:
docker --version
docker compose version
A version response confirms that the commands are installed. It does not necessarily confirm that the Docker engine is reachable. Check engine access with:
docker info| Workflow | Required host tools | Local addresses | Purpose in this guide |
|---|---|---|---|
| Linux or macOS development | Git, Python 3.11+, Node.js 20+, uv, pnpm, and a shell for dev.sh |
Frontend on port 3011 and backend on port 3018 | Local code editing and debugging |
| Windows development | Git, Python 3.11+, Node.js 20+, uv, pnpm, and PowerShell for dev.ps1 |
Frontend on port 3011 and backend on port 3018 | Local code editing and debugging |
| Docker Compose | Git and Docker with Compose support | Integrated browser entry point on port 3018 | Local operation and the Localtonet workflow |
Clone the repository and prepare configuration
Clone the current repository into a user-owned development directory:
git clone https://github.com/shy3130/tick-stock-panel.git
cd tick-stock-panel
Before executing scripts, confirm that the expected project files are present:
git status
git branch --show-current
The repository includes .env.example as its environment template. Create a local .env file on Linux or macOS:
cp .env.example .envIn PowerShell:
Copy-Item .env.example .envDistinguish required settings from optional integrations
Treat the checked-out .env.example as the source of truth for variable names. The current README describes configurable data-source capabilities and an optional OpenAI-compatible AI interface. It also states that the AI assistant fails closed when no suitable AI key is configured, directing the operator to settings instead of silently pretending that the feature works.
That supports the following practical distinction:
- Preserve every variable name and syntax shown in
.env.example. - Configure the data sources needed for the project features you intend to use.
- Treat AI-provider credentials as optional unless you intend to enable the AI functionality.
- Do not invent values for empty credentials, service URLs, feature flags, or provider-specific settings.
- Do not assume that a value is optional merely because the application starts without it. A corresponding feature may remain unavailable.
The actual current contents of .env.example were not included in the supplied evidence, so this article cannot accurately label every individual variable as required or optional. Review the comments and defaults in your checkout. If a variable is not documented there or in the repository instructions, leave it unchanged until its behavior is established.
The .env file can contain data-source and AI-provider credentials. Confirm that it remains untracked with git status, and never include it in screenshots, bug reports, container images, or commits. A Localtonet device token identifies a client device and must also remain private. Do not store that token in tick-stock-panel configuration unless current Localtonet documentation explicitly requires such a workflow.
Inspect supplied scripts before running them
The repository provides dev.sh and dev.ps1, but the available evidence does not contain their source. Before execution, open the script for your platform in a text editor and identify:
- Whether it installs or synchronizes Python dependencies with
uv. - Whether it installs frontend packages with
pnpm. - Which working directories it enters.
- Which commands start the backend and frontend.
- Whether it modifies files, creates virtual environments, or writes generated assets.
- How it handles process shutdown when one service fails or when you press
Ctrl+C.
This review is not a replacement for running the provided script. It prevents an article from falsely promising behavior that might change between repository revisions. If the script and README disagree, pause and review the current commit history or project instructions before proceeding.
Run tick-stock-panel in native development mode
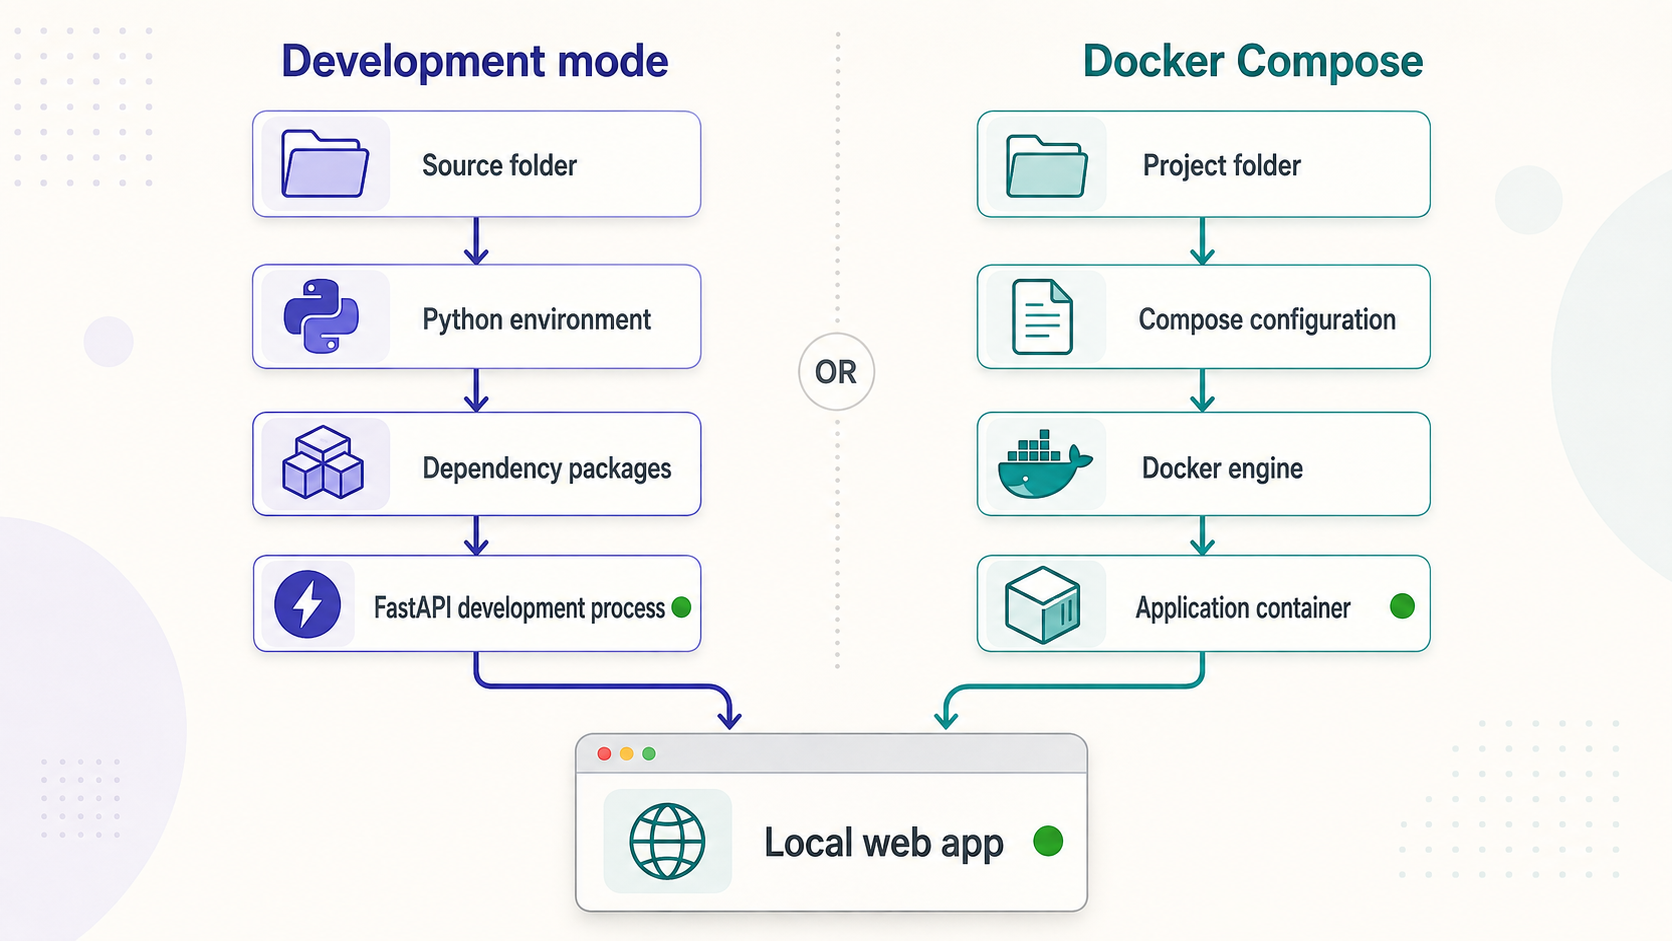
Use native development mode when modifying the React or FastAPI source. Keep both services local during this workflow unless you have independently verified the current repository's remote-development settings.
Verify the native toolchain
Run all version checks from the same terminal that will launch the project. Confirm Python 3.11 or newer and Node.js 20 or newer.
git --version
python --version
node --version
uv --version
pnpm --versionCreate and review the environment file
Copy .env.example to .env, preserve its variable names, and add only the credentials and integrations you intend to use. Confirm with git status that the environment file is not staged.
Review the platform script
Read dev.sh on Linux or macOS, or dev.ps1 on Windows. Check its package installation, startup, working-directory, and shutdown behavior against the current repository instructions.
Launch the repository-provided script
On Linux or macOS, run the shell script from the repository root:
bash dev.shOn Windows, run the PowerShell script from the repository root:
.\dev.ps1Wait for both services
Watch the startup output. The expected development addresses are http://localhost:3011 for the frontend and http://localhost:3018 for the backend. Do not continue while either process is repeatedly failing or restarting.
How the split services communicate
The frontend must send API and SSE requests to the backend, either through a development-server proxy or through an explicitly configured backend origin. Which method the current project uses must be established from the checked-out frontend configuration and API client. Likewise, remote hostname support must be established from the active Vite configuration rather than inferred from the fact that the local page opens.
Check the browser developer tools while using http://localhost:3011. Inspect the Network panel to identify the actual API request paths and origins. For an SSE-backed operation, confirm that the corresponding request remains open and receives events rather than immediately failing. Check the Console panel for CORS, blocked-host, mixed-content, and connection errors.
This local observation helps diagnose development problems, but it does not authorize public exposure. A proxy that works for localhost can behave differently when the browser loads a public HTTPS hostname. A hardcoded local backend URL can also cause a remote browser to request its own loopback interface instead of the development host.
Stop development mode
Return to the foreground terminal and press Ctrl+C. Wait for both child processes to exit. If the script starts processes in separate windows or background jobs, follow its current shutdown behavior and verify that ports 3011 and 3018 are released before starting Compose.
Build and run the integrated Docker Compose application
Docker Compose is the remote-access path used in this guide because it provides a documented single browser entry point on port 3018. Stop native development mode first, since its backend uses the same port.
Inspect the resolved Compose configuration
From the repository root, render the configuration Docker will use. This catches syntax and interpolation errors and lets you inspect ports and mounts before startup.
docker compose configVerify ports and persistence
In the rendered output, confirm that the service publishes the expected host port 3018. Record every bind mount or named volume before continuing. The current repository contents were not supplied here, so this guide does not invent a mount path or claim that all state survives container replacement.
Review Dockerfile and environment handling
Confirm what the current Dockerfile copies into the image and how docker-compose.yml supplies environment values. Make sure .env and local data are not unintentionally copied into an image that will be shared.
Build and start the application
Run the repository's documented Compose command:
docker compose up --buildKeep the terminal open during the first run and read the earliest meaningful error if the build or startup fails.
Open the integrated local endpoint
Open http://localhost:3018 on the Docker host. Confirm that the user interface loads and that the container is not repeatedly restarting before configuring Localtonet.
Routine Compose commands
Use these commands from the repository directory to inspect status and logs:
docker compose ps
docker compose logs
Stop the foreground process with Ctrl+C. To remove the Compose containers and project network without adding a volume-removal option, run:
docker compose down
Avoid docker compose down -v, broad Docker pruning, or manual deletion of mounted directories until you have identified and backed up the application's current storage. The README says application data is stored locally in formats including Parquet, but the supplied evidence does not identify the current Compose mount paths or guarantee which data survives each cleanup operation.
Verify the application before creating a tunnel
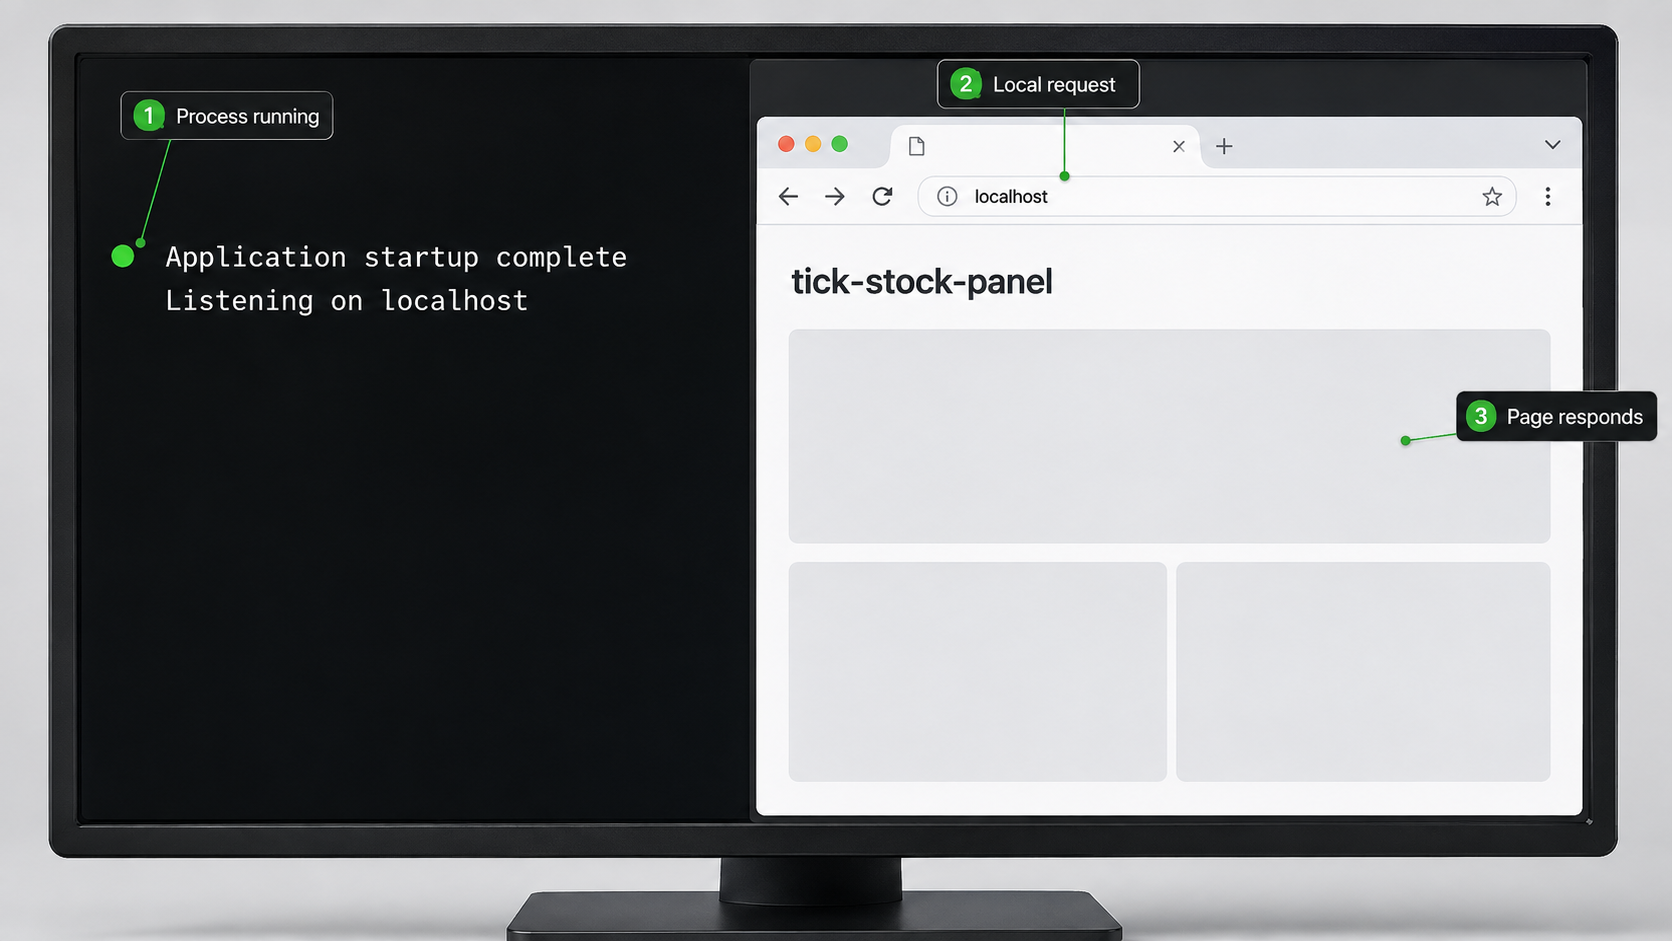
Local verification separates application failures from tunnel failures. A Localtonet HTTP tunnel forwards requests to an IP address and port reachable by the Localtonet client. It cannot repair a failed build, start a stopped container, correct data-source credentials, or make a service listen on a different interface.
Verify native development mode
- Open
http://localhost:3011and confirm that the React interface renders. - Check that
http://localhost:3018responds as expected for the backend. - Use browser developer tools to inspect API and SSE requests.
- Review both frontend and backend terminal output when a page renders but data does not load.
- Distinguish unavailable optional integrations from a general application startup failure.
A response from one port does not prove that the other service is healthy. It also does not prove that a remote browser can use the same routing arrangement. Keep this mode local under the scope of this guide.
Verify Docker Compose
Open http://localhost:3018 and exercise the application locally. Check navigation, normal data requests, and at least one operation that uses live progress or streaming if configured. Then confirm the service state:
docker compose ps
docker compose logs
Resolve connection refusals, repeated restarts, missing configuration, and fatal backend exceptions before proceeding.
Verify from the Localtonet client device
The Localtonet client can run on the tick-stock-panel host or on another device that can reach it. If both run on the same host, the Compose target is naturally 127.0.0.1:3018. If the Localtonet client runs elsewhere, 127.0.0.1 points to that other device, not to the tick-stock-panel host.
For a separate client device, determine the application's reachable private LAN address and test it from that device before creating a tunnel. For example, if the host is assigned 192.168.1.50, test http://192.168.1.50:3018. That address is only an example. Use the host's actual address and ensure the application is intentionally reachable on the local network.
Use 127.0.0.1 only when the Localtonet client and tick-stock-panel run on the same device. A tunnel configured on another computer will interpret 127.0.0.1 as that computer's own loopback interface.
Connect the Compose endpoint through Localtonet
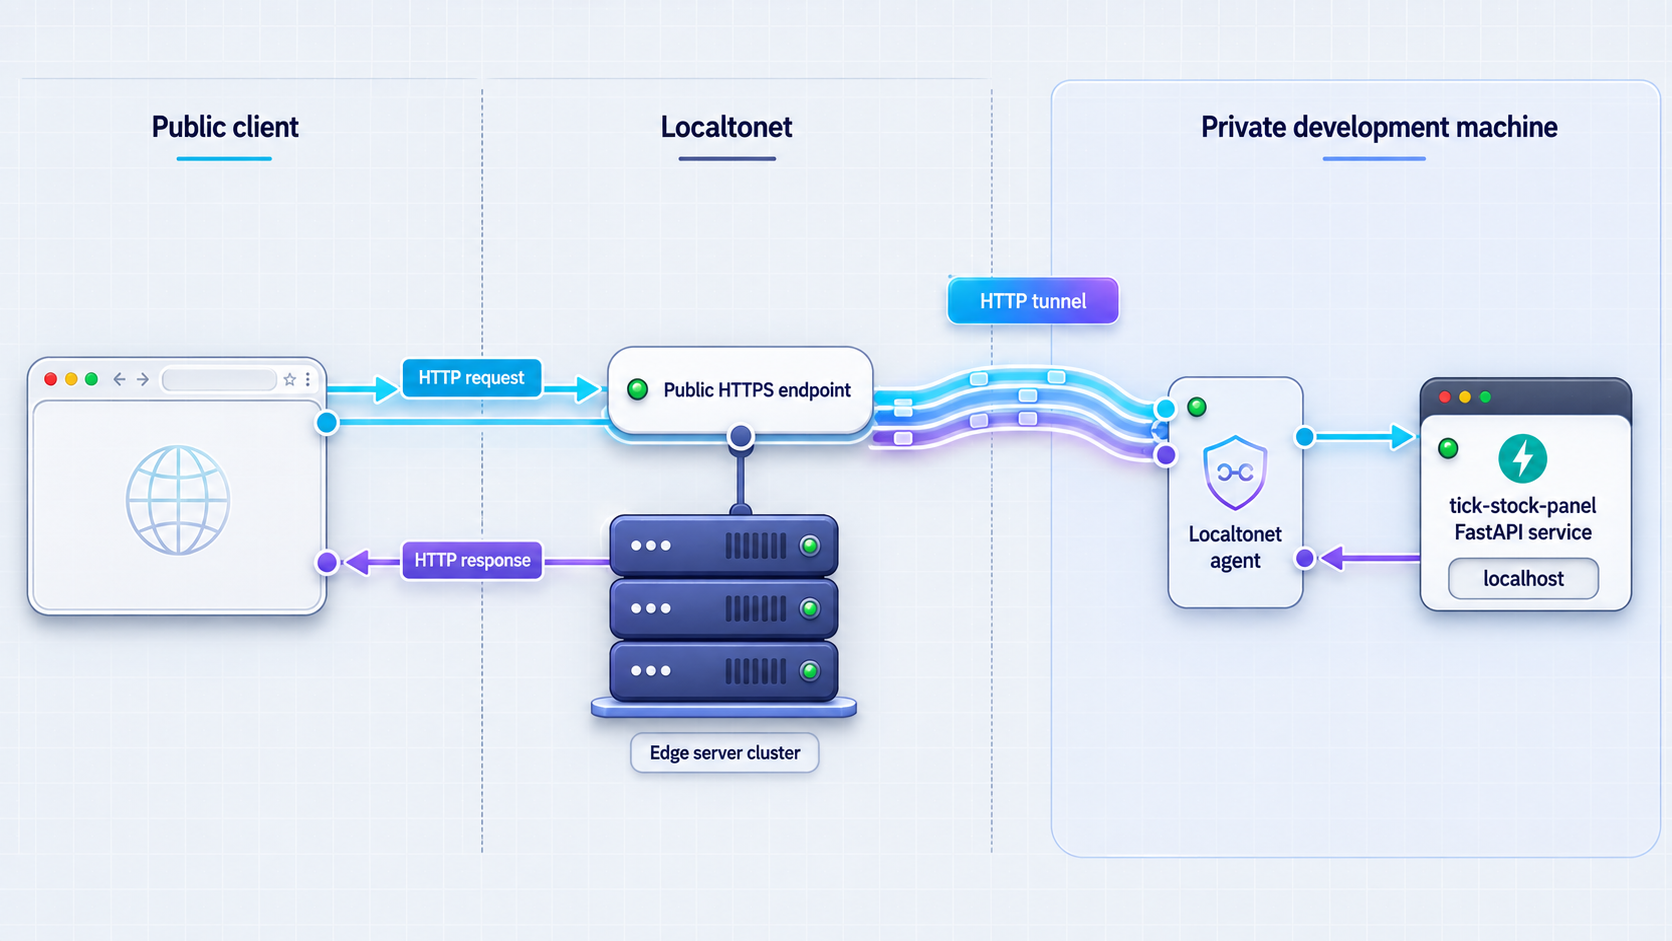
With Localtonet, our client establishes an outbound connection to a Localtonet relay server. The resulting HTTP tunnel provides a public HTTPS address for the local service without requiring inbound router port forwarding, firewall changes, VPN setup, or a public IP address.
Creating a tunnel does not start it. The public address is available only while the selected client device is connected and the tunnel is running. The following workflow targets the integrated Compose endpoint, not the development frontend on port 3011.
Install and run the Localtonet client
Install our client application on the device that can reach the verified Compose endpoint. Use the current Localtonet installer for that operating system and keep the client running. Installation details can vary by operating system and client version, so use the current download or documentation interface rather than an unverified command copied from an older tutorial.
Authenticate or select the client device
Use the device-specific authentication token for the client that will run the tunnel. Confirm that the intended device is connected. Never publish the token, place it in the tick-stock-panel repository, or include it in screenshots.
Select an available relay server
Choose an available Localtonet relay server or region from the current dashboard. Available servers, regions, and plan access can vary, so do not hardcode a server code from an article.
Create the HTTP tunnel
Create an HTTP tunnel and enter the target reachable from the Localtonet client. When both applications run on the same host, use local IP 127.0.0.1 and port 3018. When they run on separate LAN devices, use the verified private IP address of the tick-stock-panel host and port 3018.
Start the tunnel
Recheck the target, then select Start. Tunnel creation alone does not make the endpoint active. Once the tunnel is running and the selected client is connected, use the assigned public HTTPS URL shown in the dashboard.
Test and stop access deliberately
Open the public URL from a separate browser session or network. Verify that the intended application loads and that sensitive configuration is not exposed. Stop the tunnel when temporary testing or maintenance is complete.
For the current dashboard workflow, see the Localtonet HTTP tunnel documentation. HTTP tunnels can use a generated subdomain, a selected subdomain where supported, or a custom domain. Confirm current DNS requirements before configuring a custom domain.
| Target | Service represented | Guidance |
|---|---|---|
127.0.0.1:3018 with Compose |
Integrated browser application on the same host as Localtonet | Use for the supported remote-access workflow in this guide |
private-host-ip:3018 with Compose |
Integrated application on another reachable LAN device | Use only after the Localtonet client device can open it locally |
127.0.0.1:3018 in native development |
FastAPI backend rather than the complete development interface | Keep local unless remote backend access has been independently reviewed |
127.0.0.1:3011 in native development |
Vite development frontend | Not presented as a supported complete remote application in this guide |
Back up and update the installation safely
An update procedure should protect configuration and locally stored research data before rebuilding images or replacing containers. Because the supplied evidence does not reveal the exact current Compose mounts, begin by identifying them rather than assuming a fixed directory.
Create a backup inventory
- Stop the Localtonet tunnel so the application is no longer publicly reachable.
- Record the current commit with
git rev-parse HEAD. - Run
docker compose configand identify every bind mount and named volume. - Record the location of the local
.envfile without displaying its secrets. - Identify the current local Parquet, DuckDB, JSON cache, or other application-data locations from the resolved configuration and repository documentation.
git rev-parse HEAD
docker compose config
docker compose ps
Stop the application before copying active data
Stop the application cleanly before making a file-level backup. This avoids copying a database or generated dataset while it is being written:
docker compose down
Copy the identified host-mounted data directories and the private .env file to protected backup storage. If the current Compose file uses named volumes instead of host directories, use an approved Docker volume backup method appropriate for that host. This article does not provide a guessed volume name because it must match the current repository configuration.
Update without discarding the rollback point
Review local source changes first:
git statusDo not pull over uncommitted modifications without deciding how to preserve them. After backing up data and configuration, fetch the repository update using the Git workflow appropriate for your checkout. Review changes to these files before rebuilding:
.env.exampledev.shanddev.ps1Dockerfiledocker-compose.yml- Frontend Vite and API configuration
- Backend startup, CORS, host, and storage configuration
Compare the new environment template with your private configuration without committing secrets. Then validate and rebuild:
docker compose config
docker compose up --build
Test http://localhost:3018 locally before restarting the Localtonet tunnel. If the update introduces an undocumented data migration or changes mount paths, stop and consult the repository's release or migration instructions. The available evidence does not establish a universal migration command.
Security considerations for public access
A service reachable only through localhost is not equivalent to a service available through a public URL. Once the HTTP tunnel is running, internet clients that can reach the assigned address may send requests to the configured application. TLS at the tunnel edge protects transport to that edge, but it does not create authentication, authorization, safe account permissions, or data isolation inside tick-stock-panel.
The supplied repository evidence does not establish a complete internet-facing authentication model for tick-stock-panel. It also does not establish that every API, data-source setting, monitoring function, AI integration, or research result is appropriate for public access. Treat exposure as a security decision, not as an automatic part of installation.
A difficult-to-guess public address is not a substitute for application authentication, authorization, least privilege, IP restrictions, or another deliberate access-control layer. If suitable controls have not been verified for the running tick-stock-panel version, keep the tunnel stopped.
Inspect both visible pages and browser network responses. An API response can contain more information than the interface renders. Check for leaked credentials, local paths, internal hostnames, debug traces, personal watchlists, provider details, and generated research data.
For temporary access, stop the Localtonet tunnel first and then stop tick-stock-panel. For startup, reverse the order: start and verify the local application, then start the tunnel. This prevents a public endpoint from pointing to an application that is being rebuilt or reconfigured.
Troubleshooting development, Compose, and tunnel problems
A development prerequisite is missing
Run the checks in the same terminal used to start the project:
python --version
node --version
uv --version
pnpm --version
Confirm Python 3.11 or newer and Node.js 20 or newer. Restart the terminal after installing a command. If more than one runtime is installed, inspect which executable appears first in the shell path.
PowerShell will not run dev.ps1
Confirm that the terminal is in the repository root and that dev.ps1 exists. Script execution can be restricted by local or organizational PowerShell policy. Do not broadly disable security controls. Use the policy approved for the device or an authorized development environment. The repository evidence supplied here does not prescribe a specific execution-policy change.
The shell script exits immediately
Run it from the repository root through the shell:
bash dev.shRead the first meaningful error. Check for a missing prerequisite, unsupported runtime version, dependency-download failure, malformed environment value, or unavailable port. Do not delete lockfiles or generated environments until the cause is understood.
Port 3018 is already in use
Stop the previous native development process or Compose application. The native backend and default Compose workflow both use port 3018, so treat them as alternative startup modes. This guide does not invent an undocumented remapping procedure.
The frontend opens but application data does not load
Confirm that the backend is running on port 3018. Inspect the browser Console and Network panels, including the request URL, origin, status code, and response. Review the backend terminal at the same time. A rendered React page does not prove that the backend, external data sources, SSE streams, or optional AI integrations are working.
The browser reports CORS, blocked-host, or origin errors
Return to local-only development testing. Do not solve a public-access problem by adding broad wildcard origins or disabling host checks without understanding the impact. Inspect the current Vite server configuration, frontend API origin, FastAPI middleware, and SSE URL construction. This guide intentionally uses the integrated Compose endpoint rather than prescribing unverified permissive development settings.
Docker Compose cannot reach the engine
docker info
docker compose version
Start the Docker engine or desktop application. Resolve host-level permissions or service problems before rebuilding tick-stock-panel.
The Compose build fails
Check the earliest meaningful build error. Confirm that the checkout contains Dockerfile and docker-compose.yml, package registries are reachable, disk space is available, and Docker has sufficient resources. Repeatedly rebuilding without identifying whether the failure is related to networking, storage, dependencies, or configuration usually obscures the cause.
Local access works but the Localtonet URL does not
- Confirm that
http://localhost:3018still works on the application host. - Confirm that the Localtonet client is connected.
- Confirm that the intended device token was selected without exposing it.
- Confirm that the HTTP tunnel targets the correct local IP and port 3018.
- Confirm that the tunnel was started, not merely created.
- Use the public URL currently shown in the dashboard.
If Localtonet runs on another device, test the application's private LAN address from that device. Do not target 127.0.0.1 across devices.
The public page loads but a streaming operation fails
Compare the public browser's request with the locally working request. Confirm that the operation uses the integrated Compose origin rather than a hardcoded localhost address. Review the application logs for disconnects or exceptions. Avoid switching to the development frontend as a workaround unless its remote-origin, proxy, host, and SSE behavior has been verified from the current source.
The tunnel stopped unexpectedly
Verify that the Localtonet client device remains online and connected. Check whether the host slept, restarted, changed networks, or stopped Docker. A tunnel is available only while the selected client is connected and the tunnel remains running. Recheck local access before restarting it.
Frequently asked questions
What is required for native tick-stock-panel development?
The documented native toolchain is Python 3.11 or newer, Node.js 20 or newer, uv, pnpm, Git, and the appropriate shell. Use dev.sh on a compatible shell-based system or dev.ps1 in PowerShell on Windows.
Which ports does tick-stock-panel use?
Native development uses port 3011 for the React frontend and port 3018 for the FastAPI backend. The Docker Compose workflow uses port 3018 as its integrated browser entry point.
Why does this guide not tunnel the Vite development server on port 3011?
The supplied evidence does not establish the current Vite host checks, proxy rules, hot-reload origin, frontend API origin, backend CORS policy, or SSE URL behavior. Without those details, exposing port 3011 cannot be presented as a verified complete remote-development topology.
Which endpoint should I connect through Localtonet?
Use the locally verified Docker Compose endpoint on port 3018. If Localtonet runs on the same host, target 127.0.0.1:3018. If it runs on another device, use the tick-stock-panel host's reachable private IP address and port 3018.
Does Localtonet require a public IP or router port forwarding?
No. Our client establishes an outbound connection to a Localtonet relay server. This workflow does not require inbound router port forwarding, firewall changes, VPN setup, or a public IP address. The client must remain connected and the tunnel must be running.
Does a Localtonet HTTP tunnel add application authentication?
Do not assume that it does. The tunnel provides a public HTTPS route to the configured local target. Application authentication and authorization remain separate responsibilities. If suitable access controls have not been verified, keep the tunnel stopped.
Where does Docker Compose persist tick-stock-panel data?
The project describes local storage that includes Parquet data, but the exact current mount paths were not included in the supplied evidence. Run docker compose config and inspect the checked-out docker-compose.yml to identify bind mounts and named volumes before backup, update, or cleanup.
Can Docker Compose and native development mode run together?
Not with the documented default ports, because the native backend and Compose both use port 3018. Treat them as alternative startup modes unless the current repository explicitly documents a supported remapping.
Does the repository evidence prove that commercial use is prohibited?
The supplied README text says the project is for learning and research and is not investment or market-quotation software. The actual LICENSE text was not supplied, so this article does not make a broader commercial-use claim. Review the current license and third-party data terms directly before relying on a particular use right.
Connect your verified Compose service with Localtonet
Build tick-stock-panel, confirm the integrated application locally on port 3018, review its access controls, and then create an HTTP tunnel for the verified endpoint. Our outbound tunnel workflow provides remote access without opening an inbound router port or requiring a public IP address.
Get Started Free →