

Install MulmoTerminal first, prove it works on localhost, then decide how much of it you want on the internet
MulmoTerminal is a browser-based workspace that runs several AI coding agents, such as Claude Code and Codex, side by side in a grid of terminal cells. It starts on your own machine at port 34567, which is convenient at a desk and awkward when you want to check an agent from your phone or from another computer. This guide covers the documented install and launch path, how to verify it locally, and the common startup problems. It then adds a Localtonet HTTP tunnel as a separate, clearly marked step, with a frank discussion of the risk, because every cell in MulmoTerminal is a real shell.
📋 What's in this guide
What MulmoTerminal is and why people run it
Anyone who runs more than one AI coding agent at a time knows the problem. You open several terminals, lose track of which one is doing what, forget which directory each one is in, forget what you asked, and do not notice when an agent has finished. If you close a terminal, the session disappears. MulmoTerminal is built to answer that set of annoyances. It runs multiple agents in parallel (the project names Claude Code and Codex), arranges them in a grid, and shows state and location at a glance.
Based on the project's own description, the main ideas are these. Cells are color coded by state: working is blue, waiting for input is amber, and finished or waiting for review is a green ring, with notification sounds on top. Each cell shows its directory and a project badge. The cell header keeps the latest instruction or current activity visible. A git status chip and one-click actions open the folder in your OS file manager, in the in-app file view, or on a pull request. Optional tmux persistence lets sessions survive reloads, reconnects and server restarts. The project also describes worktree isolation, so several agents can work in one repository without colliding, with diff, commit, push and an Open PR action available from inside the cell.
That last item is why remote access comes up so often. The project itself mentions using MulmoTerminal from a phone and from another machine. This article does not try to replace the project's own phone-notification setup page. What we cover is the narrower networking question: how do you reach the web UI that is listening on your workstation when you are not sitting at it? That is the part where Localtonet fits.
Prerequisites before you install
MulmoTerminal is distributed through npm and launched with npx, so you do not clone a repository or build anything for a normal install. The requirements below are the ones stated by the project.
| Requirement | Status | Why it matters |
|---|---|---|
| Node.js 22.12 or newer | Required | The project states Node 22.12 or higher. Older versions are outside the stated support range. |
The claude CLI (Claude Code) on PATH, already logged in |
Required by default | Claude is the default agent. You can instead point to the binary with the CLAUDE_BIN environment variable. It must already be authenticated before MulmoTerminal launches it. |
git and gh on PATH |
Required per the project site | The git status chip, worktree and pull request features rely on these tools. |
tmux |
Optional | Gives session persistence across reloads, reconnects and server restarts. |
codex |
Optional | Needed only if you want Codex sessions. |
ffmpeg and ollama |
Optional | The project lists ffmpeg for video rendering and ollama for local models. You do not need them for a first run. |
Check your Node version first, since that is the most common blocker:
node --versionIf the output is lower than 22.12, upgrade Node before continuing. The project publishes a getting-started page that walks through opening a terminal and installing Node.js, Claude Code, git and gh on macOS and Windows. We do not reproduce those OS-specific installer steps here, because we have not independently verified them for every platform. Beyond macOS and Windows, the evidence available to us does not state which other operating systems are supported, so check the project's documentation if you are on something else.
MulmoTerminal launches the agent CLI inside each cell. It does not log you in. Run the claude command once in a normal terminal, complete its login, and confirm it works before you start MulmoTerminal. The same applies to codex if you plan to use it.
Install and launch MulmoTerminal
There is no separate install command to memorize. The documented launch command downloads the latest published package through npx if needed and starts it:
npx mulmoterminal@latest
On success it starts a local server on port 34567 and opens your browser at http://localhost:34567. If you want to check dependencies before you launch, the project provides an init subcommand that reports anything missing:
npx mulmoterminal@latest init
Because the command uses @latest, each launch resolves the newest published version. At the time of our research, the release page we reviewed was 12.0.0, a major version whose headline change is how a clicked file path behaves in the tiled grid. Later versions may differ in details, so treat screenshots or menu names in any guide, including ours, as a snapshot rather than a promise.
Choose a working directory and port at launch
The project documents two launch options. --cwd sets the working directory the app starts in, and --port changes the port (the project site writes it as --port <n>):
npx mulmoterminal@latest --cwd ./my-projectWe will keep the default port 34567 throughout the rest of this guide. If you change the port, use your chosen number everywhere we mention 34567, including in the Localtonet tunnel later.
Start with the foreground process
Leave the launch command running in a terminal window while you verify. We have not confirmed an official background or service-mode launch, so we do not document one. If you want it to outlive your login session, check the project documentation or use your own process supervisor, and remember that the Localtonet tunnel only works while the app is actually listening.
Verify the install on localhost
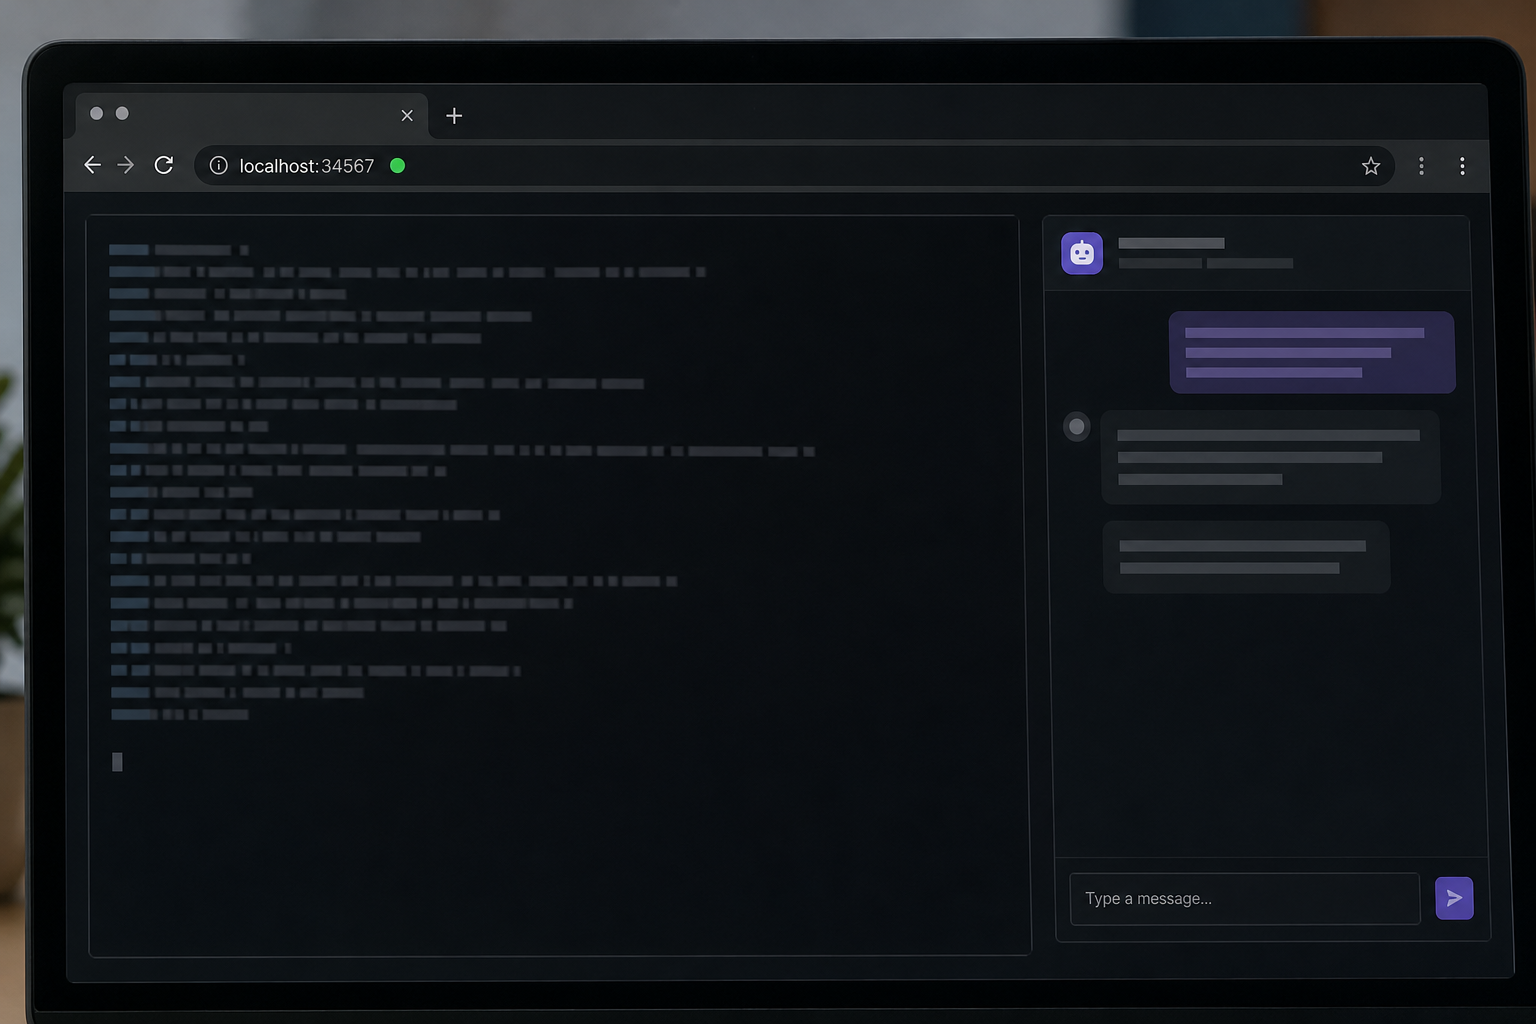
Do not add a tunnel until the local setup is boringly reliable. A tunnel only forwards traffic to whatever is listening locally, so it cannot fix an app that is not healthy. Work through this checklist on the machine running MulmoTerminal.
Confirm the process is running
The terminal where you ran npx mulmoterminal@latest should still be active, with no stack trace. If it exited with ERR_MODULE_NOT_FOUND, jump to the troubleshooting section.
Open the web UI
Browse to http://localhost:34567. The launcher normally opens it for you. You should see the grid workspace load.
Start an agent cell and send a harmless prompt
Open a cell with your default agent and ask something safe, such as having it describe the files in the working directory. This proves the agent CLI is on PATH, logged in, and able to run.
Check that the terminal is live
Output should stream as it is produced and keystrokes should appear immediately. The terminal is rendered in the browser with xterm.js and fed over a WebSocket, so a frozen or blank terminal usually points to a connection problem rather than a rendering problem.
Reload the page
Reload the tab and see what happens to the session. With tmux installed, the project describes sessions surviving reloads and reconnects. Without tmux, do not expect that behavior.
If you prefer a command-line check that the port is answering, a basic HTTP request from the same machine works with standard tools:
curl -I http://localhost:34567
Any HTTP response at all tells you something is listening on 34567. To see which process owns the port on macOS or Linux, lsof -i :34567 is a standard option. On Windows, netstat -ano shows listening ports with their process IDs. These are general operating system tools, not MulmoTerminal features.
Choose the agent, working directory and defaults
Once the basic launch works, there are a few settings worth knowing about. We limit this section to what the project states explicitly.
Switch the default agent
Claude Code is the default. To make Codex the default for one run, pass the agent flag:
npx mulmoterminal@latest --agent codex
To make it permanent, the project documents a defaultAgent key in ~/.mulmoterminal/config.json. A minimal illustration looks like this:
{
  "defaultAgent": "codex"
}
We have not seen the complete schema of that file, so if it already exists with other keys, add the key rather than replacing the whole file. We also cannot list other valid values beyond the two agents the project names.
Point to a specific Claude binary
If claude is not on your PATH, or you have several installs, set CLAUDE_BIN to the binary you want. In a POSIX shell that looks like the following, with a placeholder you must replace:
CLAUDE_BIN=/path/to/claude npx mulmoterminal@latestOptional: enable session persistence with tmux
Installing tmux is the project's documented route to sessions that outlive a browser tab. For remote use this matters: a phone browser tab is far more likely to be suspended or dropped than a desktop one, and persistence means reconnecting to the same session rather than starting over. Install tmux with your operating system's package manager and relaunch MulmoTerminal. The project does not require it, so this is a convenience, not a prerequisite.
A note on files opened from terminal output
Release 12.0.0 changed how clicking a file path in terminal output behaves on the tiled grid. A click now opens the Files pane beside the cell that printed the path, including for some text files located outside the cell's directory, which open by absolute path. The release describes a setting named fileLinkOpensPane, on by default and found as a checkbox under Settings, Terminal keys. Setting it to false keeps the older behavior of opening a new tab or the Files view. We mention this because it is a visible behavior difference you may notice, and because the Files pane can read and save files, which is relevant to the security discussion that follows.
Read this before you expose it to the internet
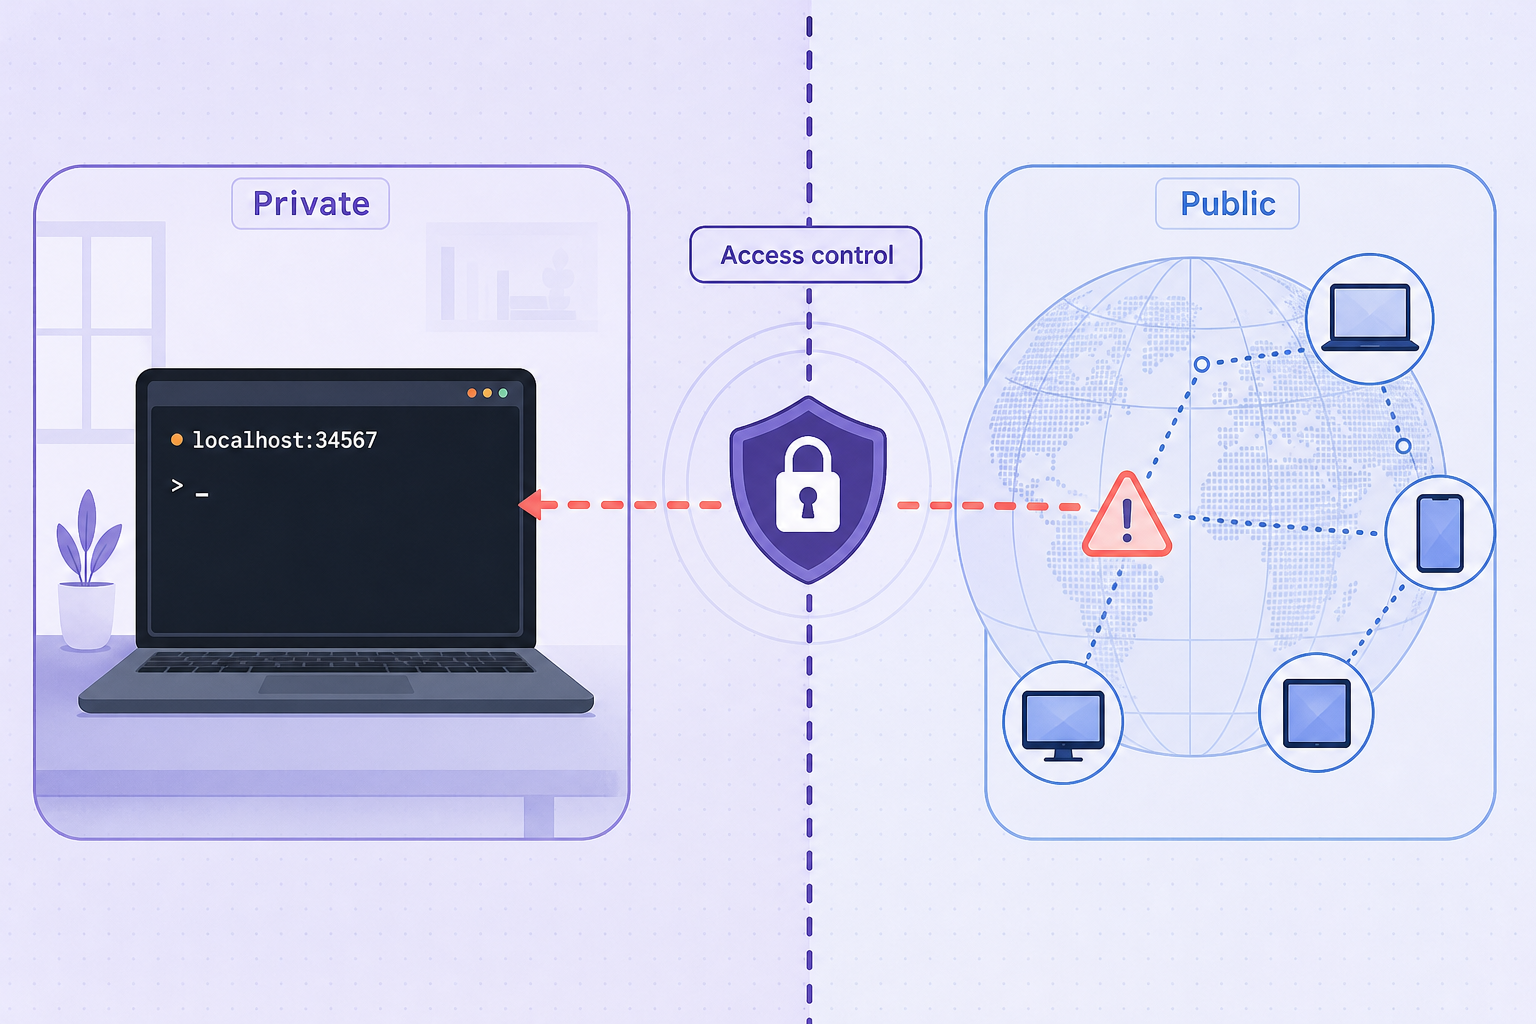
Everything up to this point stayed on your machine. Putting a tunnel in front of port 34567 changes the threat model, so it deserves its own section.
Each cell is a real pty running your shell and your logged-in agent CLI. Anyone who can reach and use the web UI can potentially run commands as your user, read and write files in your project directories, and spend your agent subscription. Do not treat a random public URL as a security boundary.
The information we have does not establish how MulmoTerminal authenticates browser users, whether it restricts which Host or origin it accepts, or which network interface it binds to. We also found no official guidance about running it behind a tunnel or reverse proxy. Because we cannot verify those things, we will not claim that the UI is password protected, nor that it only listens on loopback. Check the project's configuration documentation and test it yourself before relying on any assumption. A simple test: after you create the tunnel, open the public address in a private browser window with no cookies and see whether it asks you for anything before showing the workspace.
Given that uncertainty, we recommend a conservative posture:
- Assume no built-in login until you have proved otherwise. If the public URL loads the grid without any prompt, anyone who learns the URL can use it.
- Keep the tunnel stopped when you are not using it. A Localtonet tunnel only exists while it is started and the client is connected. Starting it on demand shrinks the exposure window.
- Prefer an access control layer in front of it. Use whatever access restrictions your Localtonet plan and dashboard offer, and verify in the dashboard which options exist, since we do not hardcode plan-dependent features here. An authentication or IP restriction layer is much safer than relying on a hard-to-guess hostname.
- Do not share the URL. Treat it like a credential. A generated subdomain is not a secret in any cryptographic sense.
- Run it with least privilege. Start MulmoTerminal as a normal user in a dedicated working directory, ideally on a machine or account that does not hold production credentials, SSH keys with broad reach, or cloud admin tokens.
- Do not rely on the tunnel to bypass your own policies. If your employer or network rules forbid exposing developer machines, a tunnel does not change that. Check before you proceed.
This is also a good moment to decide whether you need a public URL at all. If your only goal is phone notifications when an agent finishes or needs input, the project's Web Push feature is aimed at exactly that, and its setup is documented on the project's own site. Public exposure of the whole workspace is a heavier tool than push notifications.
Reach MulmoTerminal through a Localtonet HTTP tunnel
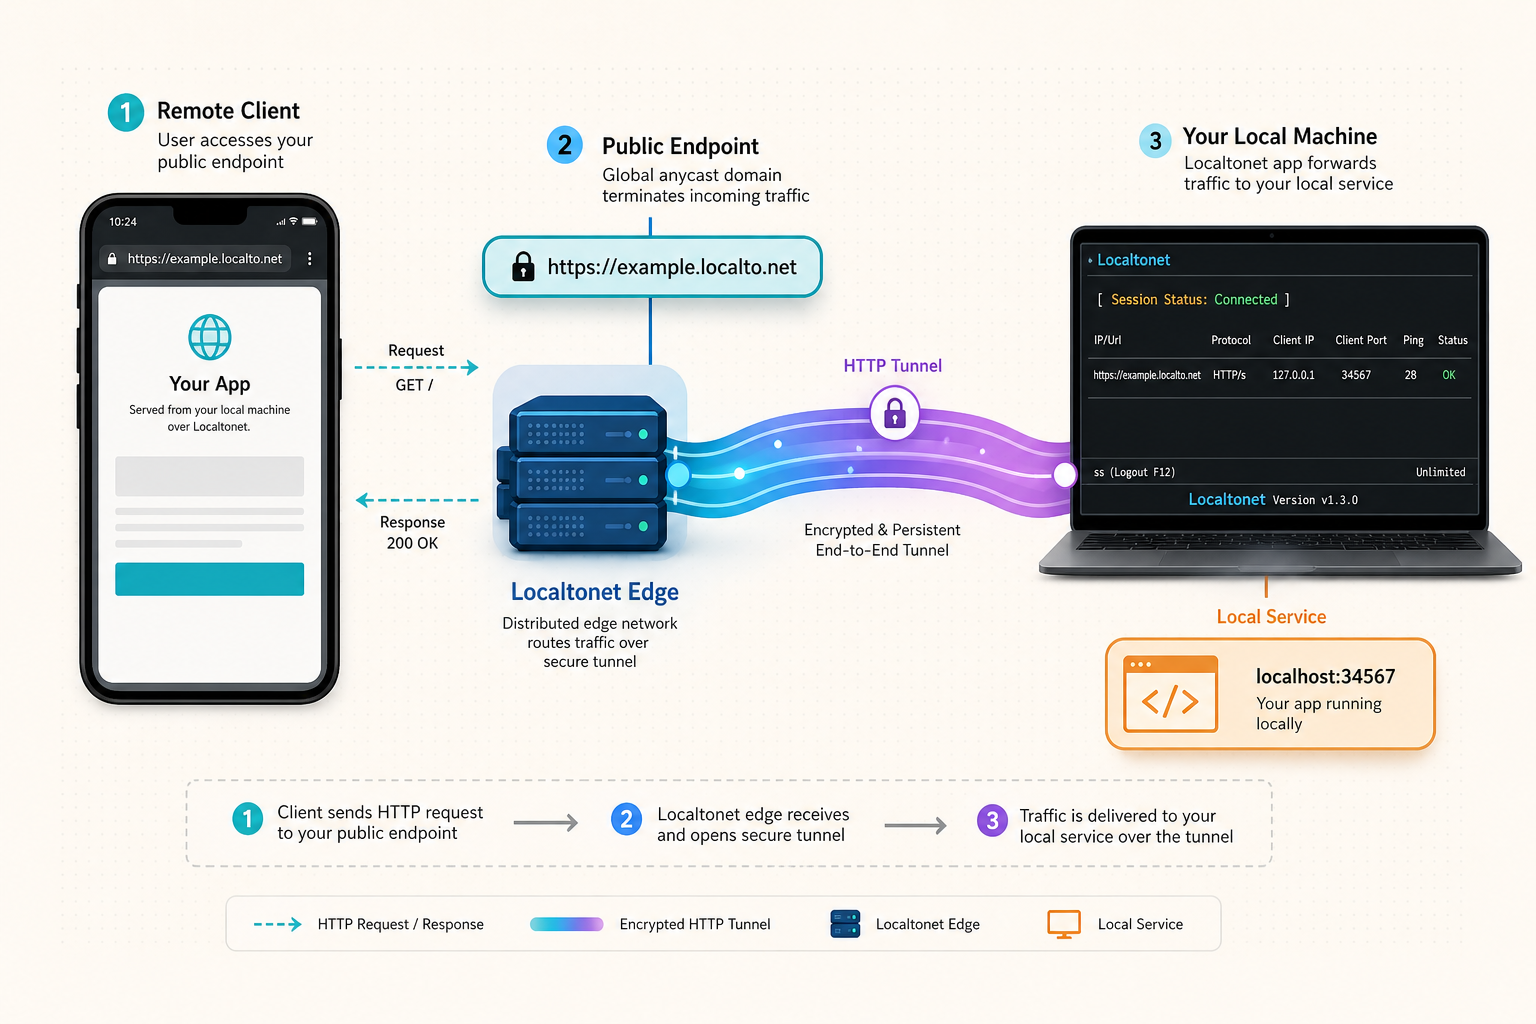
With the app verified and the risks understood, the remote-access step is short. Localtonet is a tunneling platform: the client application on your device makes an outbound connection to a Localtonet relay server, and the tunnel provides a public address that forwards to a local service. This works without router port forwarding, firewall changes, or a public IP address. The tunnel is available only while the selected client is connected and the tunnel is running.
MulmoTerminal is a web application, so the right tunnel type is HTTP. Its local target is the machine's loopback address and port 34567. For the complete reference on the tunnel type, see the Localtonet HTTP tunnel documentation. The sequence below follows our general workflow for a local web service. Exact button labels and field names can change, so use the dashboard and documentation as the final authority.
Install and run the Localtonet client on the MulmoTerminal machine
The client must run on a device that can reach the service on port 34567. In the simplest case that is the same computer where you ran npx mulmoterminal@latest.
Authenticate the device with its token
Each device is identified by an auth token from your dashboard. Keep it private and never paste it into chats, screenshots or repositories. Anyone holding it can act as that device.
Select an available relay server
Choose from the servers or regions shown in your dashboard. Available values are current-product details, so we do not list them here.
Create an HTTP tunnel to 127.0.0.1 on port 34567
Choose the HTTP tunnel type, select your token and server, and set the local target to the address and port where MulmoTerminal is listening. Pick a Process Type: Random Sub Domain, Custom Sub Domain, or Custom Domain. All serve the same content at a public HTTPS address. For custom domains, follow the current DNS instructions in the documentation rather than guessing.
Start the tunnel
Creating a tunnel does not run it. Press Start, then copy the assigned public address from the dashboard.
Test, then stop or delete when finished
Open the public address from another device or network, confirm the grid loads and a terminal streams, and stop the tunnel as soon as you no longer need it.
The MulmoTerminal UI streams each terminal to the browser over a WebSocket. Our supplied product notes do not specifically state WebSocket behavior for HTTP tunnels, so we do not promise it here. The practical test is the one from the verification section: open the public address, start a cell, and confirm that output streams live and keystrokes register. If the page loads but terminals stay blank or disconnect, report that to us with the tunnel type and the behavior you saw rather than assuming it is a MulmoTerminal bug.
If MulmoTerminal runs on a different machine than the Localtonet client
A Localtonet HTTP tunnel can point at an address that is reachable from the client device, not only at the same host. In principle you can run the client on one machine and target another machine on your network. We have no evidence about which network interface MulmoTerminal binds to, so this layout may fail if the app only listens on loopback. The safer and simpler arrangement is to run the Localtonet client on the same machine as MulmoTerminal and target loopback.
Know when your device drops off
A tunnel only works while the client is connected. If you rely on this to monitor long-running agents, you may want to know when your device disconnects. Our platform-wide webhooks fire when a token or tunnel in a selected Token Group changes to Connected or Disconnected, delivering a JSON body with the id, timestamp, type and status. See the Localtonet webhook documentation for the details. This is separate from any MulmoTerminal notification system, and the two should not be confused.
Using MulmoTerminal from your phone or another machine
Once the tunnel is started, the public address behaves like any website. Open it in a phone browser or on a second computer. A few practical points apply, mixing what we know about MulmoTerminal with common sense about mobile browsers.
What you can reasonably expect
The workspace is a web page, so on a phone you are using a desktop-oriented terminal grid on a small screen. The project's site specifically highlights the cockpit roster, where you stay on one enlarged agent while a text list tracks every session. That layout is a sensible fit for a narrow screen because you can glance at status, read the last prompt and reply, and then answer. Typing long commands on a phone keyboard is uncomfortable, so plan to use it for supervising and replying (approve, continue, redirect) rather than for authoring large changes.
Web Push versus a public tunnel
The project documents phone notifications with Web Push, plus a live view where you answer with a tap. These features have their own setup page on the project's site. We have not verified whether, or how, they behave when the app is reached through a tunnel, and browsers generally require a secure context for push features. Our HTTP tunnels serve content at a public HTTPS address, which is consistent with that, but treat the combination as something to test rather than a documented guarantee. If push does not work through the tunnel, follow the project's own phone notification instructions, since they are the authority on that feature.
| Goal | Approach | Exposure |
|---|---|---|
| Get told when an agent finishes or waits | MulmoTerminal's own Web Push to the phone, following the project's setup page | Depends on the project's design; verify how it reaches your phone |
| Look at a live session and reply from anywhere | Localtonet HTTP tunnel to port 34567, started on demand | The whole workspace is reachable while the tunnel runs, so add access control and stop it afterward |
| Use it from another computer on the same network | Open the local address directly, if the app is reachable on your LAN | Not confirmed by our evidence; the app's bind address is unverified |
Daily operation and routine checks
After the first successful run, a lightweight routine keeps things predictable.
- Start order: start MulmoTerminal first, confirm
http://localhost:34567loads, then start the Localtonet tunnel. Stopping goes in reverse: stop the tunnel first, then the app. - Updates: because the documented command uses
@latest, each fresh launch fetches the newest package. Major versions can change behavior, as 12.0.0 did for clicked paths on the tiled grid, so skim the release notes after an update if something looks different. - Dependency drift: if an agent suddenly fails to start in a cell, run
npx mulmoterminal@latest initto see whether a dependency has gone missing from PATH. - Agent logins expire: if the
claudeorcodexCLI needs re-authentication, do it in a normal terminal on the host machine, not through the remote session. - Review the tunnel list: delete tunnels you no longer use. An unused but still defined tunnel is easy to forget, and one that is started is a live path to your shell.
- Mind what the agent can reach: a remote session has the same filesystem access as a local one. Keep sensitive projects out of the directory you launch with
--cwdwhen you plan to work remotely.
Troubleshooting
ERR_MODULE_NOT_FOUND on launch
The project describes a specific cause. If the very first npx installation is interrupted, a half-unpacked folder under ~/.npm/_npx/<hash> can remain, and the next launch fails at startup. The project says this is a corrupted npx cache and not a bug in the published package. The launcher detects the situation and prints the exact removal command. Run that command, then run npx mulmoterminal@latest again. Use the command the launcher prints rather than deleting directories by hand, since it targets the specific broken entry.
The agent does not start inside a cell
Check that the claude CLI (or codex, if you chose it) works in a normal terminal, is logged in, and is on PATH for the same shell environment that launched MulmoTerminal. A GUI-launched terminal and a login shell sometimes have different PATH values. If the binary lives somewhere unusual, set CLAUDE_BIN. Then run npx mulmoterminal@latest init for a dependency report.
Node version errors
If startup complains about the runtime or fails in unexpected ways right after install, confirm node --version reports 22.12 or newer. Version managers can leave you on an older Node in a new shell, so check in the same terminal where you launch.
Port 34567 is already in use
Another process, or an earlier MulmoTerminal instance, may be holding the port. Find it with lsof -i :34567 (macOS, Linux) or netstat -ano (Windows), stop it, or start MulmoTerminal on a different port with --port and update your Localtonet tunnel target to match.
The tunnel address loads nothing, or returns an error
Work from the inside out. First confirm http://localhost:34567 works on the host. Then confirm the tunnel was actually started, not merely created, and that the client device shows as connected. Check that the local target matches the real port, particularly if you changed it. Finally, confirm the Localtonet client is running on a machine that can reach the target address.
The page loads remotely but terminals are blank or disconnect
This is the symptom that points to the WebSocket stream rather than the page itself. Confirm the local terminal streams correctly first. If it does locally but not through the tunnel, note exactly what you see and contact us, as we have no verified statement about this specific case to offer. Also try a different browser or network, because mobile networks and corporate proxies can interfere with long-lived connections independently of any tunnel.
Sessions disappear after a reload or restart
That is the expected behavior without tmux. Install tmux, as the project documents, and relaunch. This is more noticeable on phones, where tabs are suspended aggressively.
What we cannot tell you
Honest limits matter in a guide like this. The evidence behind this article does not establish MulmoTerminal's authentication model, its default bind address, any allow-list of hosts, or any official tunnel or reverse-proxy recommendation. It also does not give a documented way to run it as a background service. If your use case depends on any of those, read the project's current documentation and test behavior directly.
Frequently asked questions
How do I install and start MulmoTerminal?
Install Node.js 22.12 or newer, make sure the claude CLI is on your PATH and already logged in, and run npx mulmoterminal@latest. The app starts on http://localhost:34567 and opens your browser. The project also lists git and gh as required on PATH, and tmux, codex, ffmpeg and ollama as optional extras. Running npx mulmoterminal@latest init reports missing dependencies.
Which port does MulmoTerminal use, and can I change it?
The default is 34567. The project documents a --port option to choose another one. If you change it, point your Localtonet HTTP tunnel at the new port.
Can I use Codex instead of Claude Code?
Yes. Launch with --agent codex for a single run, or set defaultAgent in ~/.mulmoterminal/config.json to make it the default. The codex CLI needs to be installed and logged in, just as claude does for the default setup.
Is it safe to put MulmoTerminal on the internet with a tunnel?
Only with care. Each cell is a real shell with your logged-in agent, so anyone who can use the web UI may be able to run commands as you. The evidence we have does not establish a built-in authentication model, so assume none until you test it. Add access controls in front of it, start the tunnel only when needed, run it as a low-privilege user, and never share the URL.
Which Localtonet tunnel type should I use for MulmoTerminal?
Use an HTTP tunnel, because MulmoTerminal's interface is a web page. Set the local target to the machine's loopback address and port 34567, choose a Process Type (Random Sub Domain, Custom Sub Domain or Custom Domain), and press Start. Standard tunneling is not a VPN. If you need a private network between your own devices, that is the separate VPN Manager feature.
Do I need tmux?
No, it is optional. Without it MulmoTerminal still runs. With it, the project describes sessions surviving reloads, reconnects and server restarts, which is especially helpful on a phone browser.
Why does the launch fail with ERR_MODULE_NOT_FOUND?
The project attributes it to an interrupted first npx install that left a corrupted cache under ~/.npm/_npx. The launcher detects this and prints the removal command. Run that command and launch again with npx mulmoterminal@latest.
Does the tunnel stay up when I close my laptop or stop the client?
No. A tunnel is available only while the selected client or device is connected and the tunnel is running. If the machine sleeps or the client stops, the public address stops working until the client reconnects and the tunnel is running again.
Reach your agent grid from anywhere, on your terms
Get MulmoTerminal running and verified on localhost first, then create a Localtonet HTTP tunnel to port 34567 when you actually need remote access. Start it when you need it and stop it when you are done.
Get Started Free →