

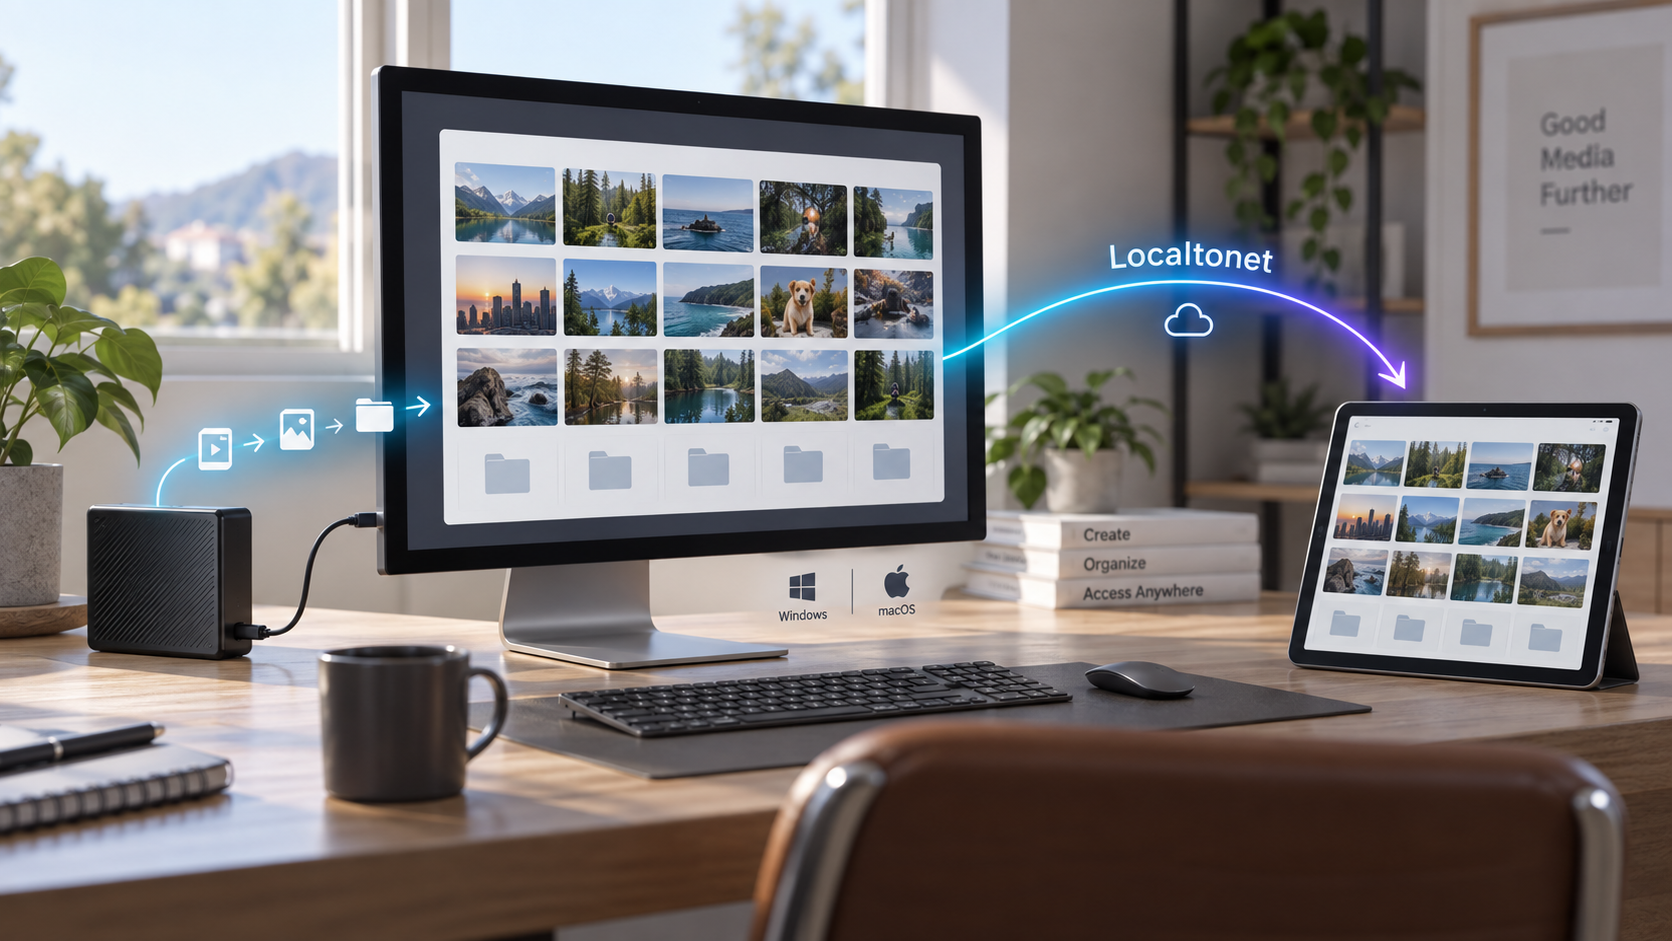
Build a local media library first, then add controlled browser access
OpenAver is an open-source desktop media-management application that scans an existing collection, reads compatible NFO files and artwork, enriches missing metadata, and presents the result through a visual library interface. This guide covers supported Windows and Apple-silicon macOS installations, first-run library configuration, local verification, routine operations, server mode, and practical troubleshooting. After the application works locally, we will connect its browser interface to an HTTP tunnel with Localtonet. Because OpenAver chooses or displays important connection details at runtime, we will use the address shown by the application instead of assuming a packaged-app port.
📋 What's in this guide
What OpenAver does and how this setup fits together
OpenAver is designed for organizing and browsing a media collection stored on a Windows or macOS computer, an attached disk, or a reachable network share. It can scan an existing library, import metadata from NFO files, recognize associated artwork, identify incomplete entries, and retrieve missing public metadata when requested. Its Showcase interface turns the resulting catalog into a browsable cover wall with filtering and detailed views.
The project separates its normal workflow into three principal areas. Scanner adds and scans existing library folders. Showcase provides the visual browsing interface. Search handles new files, metadata lookup, preview, and optional organization. Understanding that separation helps prevent accidental file operations: scanning an existing collection is different from selecting an explicit organize action.
OpenAver states that normal scanning reads existing files without rewriting the source collection. If compatible NFO files and artwork already sit beside a video, the scanner can import them directly. When enrichment is requested, new NFO and artwork files may be written beside the media, but the video itself is not supposed to be moved merely because the library was scanned. Renaming or relocation occurs only when the user explicitly invokes the organize workflow according to configured rules.
The recommended order is deliberately installation-first. Install OpenAver, complete its onboarding, scan a controlled test folder, and confirm the browser interface on the local network. Only then should you create a Localtonet tunnel. This isolates application issues from networking issues and prevents a partially configured library from being exposed accidentally.
OpenAver documents a browser-facing server mode and a local REST API whose port appears under Settings in the AI API section. Do not assume that these use the same port or provide the same access. This guide exposes the browser interface. Expose the REST API only if you have a separate, deliberate integration plan and appropriate authorization controls.
Prerequisites and platform support
The packaged desktop installation has specific platform boundaries. Windows users need Windows 10 or Windows 11 on x64 hardware. macOS users need an Apple-silicon Mac, identified by the project as M1 or later. The supplied packaged macOS build is arm64, so Intel-based Macs are not part of the documented packaged-app path.
You also need at least one folder containing the media you want OpenAver to catalog. For a cautious first run, create a small test folder or use a limited representative subset of your library. Include a few items with existing NFO files and artwork if you want to verify import behavior, plus an incomplete item if you want to test enrichment.
OpenAver performs its core catalog work locally, but metadata scraping requires outbound internet access to public metadata providers. Network availability and provider behavior can affect search or enrichment even when local scanning works correctly. Existing metadata can still be imported without treating an online lookup as a prerequisite for every item.
| Requirement | Windows | macOS | Why it matters |
|---|---|---|---|
| Supported packaged platform | Windows 10 or 11, x64 | Apple silicon, M1 or later | The official release assets are built for these targets. |
| Installation route | PowerShell installer, setup batch file, or x64 ZIP | Shell installer or arm64 ZIP | The scripted installer is the simplest route, while ZIP files provide a manual alternative. |
| Library storage | Local, attached, or reachable network storage | Local, attached, or reachable network storage | OpenAver must be able to read every configured source path. |
| Browser device | Same computer or another device on the same Wi-Fi for initial testing | Same computer or another device on the same Wi-Fi for initial testing | Local verification should be complete before remote access is added. |
| Localtonet client | Installed on the OpenAver host or another device that can reach it | Installed on the OpenAver host or another device that can reach it | Our client must be able to connect to the exact local address and port shown by OpenAver. |
If you plan to browse from a phone or tablet before configuring Localtonet, place that device on the same local network as the computer running OpenAver. Client isolation on guest Wi-Fi can block device-to-device traffic even though both devices have internet access. Use a normal trusted LAN or Wi-Fi segment where local communication is permitted.
A normal scan is intended to be read-only with respect to the source collection, but enrichment can add files and the explicit organize action can rename or move content. Keep a backup of valuable NFO files, custom artwork, and irreplaceable library data. Test naming and destination rules on a small sample before applying them to a large collection.
Install OpenAver on Windows or macOS
Windows installation with PowerShell
The official one-line Windows route downloads and runs the repository's installation script. Open PowerShell in your normal user session and run:
irm https://raw.githubusercontent.com/slive777/OpenAver/main/install.ps1 | iexThe installer downloads the current packaged release and creates a Windows desktop shortcut. The project also states that upgrades performed through this installation route retain existing settings. Follow the prompts presented by the installer and allow it to finish before opening the application.
The PowerShell pipeline downloads code and executes it immediately. That is the project's documented convenience method, but it may not be suitable for every environment. In a managed workplace, inspect the script, use the release ZIP or setup batch file as permitted, and follow your organization's software-installation policy.
Open PowerShell
Start a normal PowerShell window on the Windows 10 or Windows 11 computer where the media paths are available.
Run the official installer command
Paste the command shown above, confirm that its URL points to the OpenAver repository, and run it. Wait for the current release to download and install.
Launch OpenAver
Open the application from the desktop shortcut created by the installer. If Windows presents a security prompt, verify the application source before continuing.
Complete the first-run guide
Use the onboarding interface to select a test library folder and generate the initial library view. Configuration details are covered in the next section.
Windows alternatives
If you do not want to use PowerShell, download OpenAver-Windows-Setup.bat from the project's release area and run it. The project describes this as an alternative entry point to the same installation process. Obtain it only from the official OpenAver repository or release page, and inspect the downloaded filename before execution.
A manual Windows ZIP is also available using the naming pattern OpenAver-vX.X.X-Windows-x64.zip, where the version replaces X.X.X. Extract it into a folder where your account has permission to run and update the application. The project warns that manual ZIP installations require an additional security-unblocking step and supplies troubleshooting information inside the archive. Follow the instructions included with the exact release rather than guessing which Windows security flag must be changed.
macOS installation with Terminal
On an Apple-silicon Mac, open Terminal and run the documented shell installer:
curl -fsSL https://raw.githubusercontent.com/slive777/OpenAver/main/install.sh | bashThe command downloads the maintained installation script from the OpenAver repository and passes it to Bash. Allow the process to complete, then launch OpenAver and proceed through onboarding.
Confirm that the Mac uses Apple silicon
Use this packaged route only on an M1 or later Mac. The documented macOS release archive is arm64 and does not establish packaged support for Intel Macs.
Run the installer in Terminal
Paste the command shown above into Terminal. Verify the repository URL before running it and wait for the script to finish.
Open the application
Launch OpenAver. If macOS displays a security decision, verify that the application came from the official project before following the release-specific troubleshooting guidance.
Start onboarding
Select a small library folder and generate the initial interface before adding the rest of the collection.
Manual macOS ZIP installation
The manual archive uses the naming pattern OpenAver-vX.X.X-macOS-arm64.zip. Download the archive for the release you intend to install, extract it, and follow the troubleshooting guidance packaged with that release. As with Windows, the project notes that manually downloaded ZIP builds need an additional security-unblocking step. The precise security prompt can vary with the operating-system version, so follow the archive's current instructions rather than applying unrelated commands found elsewhere.
Source-based development installation
OpenAver also documents a development path using Python 3.12, a virtual environment, the repository's requirements.txt, and Uvicorn. That route is intended for source development or an unsupported server-style deployment rather than the normal Windows and macOS desktop experience.
The available evidence does not establish the complete current checkout, frontend build, or Uvicorn entry-point command, so we will not invent those commands here. If you specifically need a source build, use the instructions from the exact repository revision you checked out. The development example uses 127.0.0.1:8000, but that value must not be treated as the packaged application's default address or port.
Configure and scan your first media library
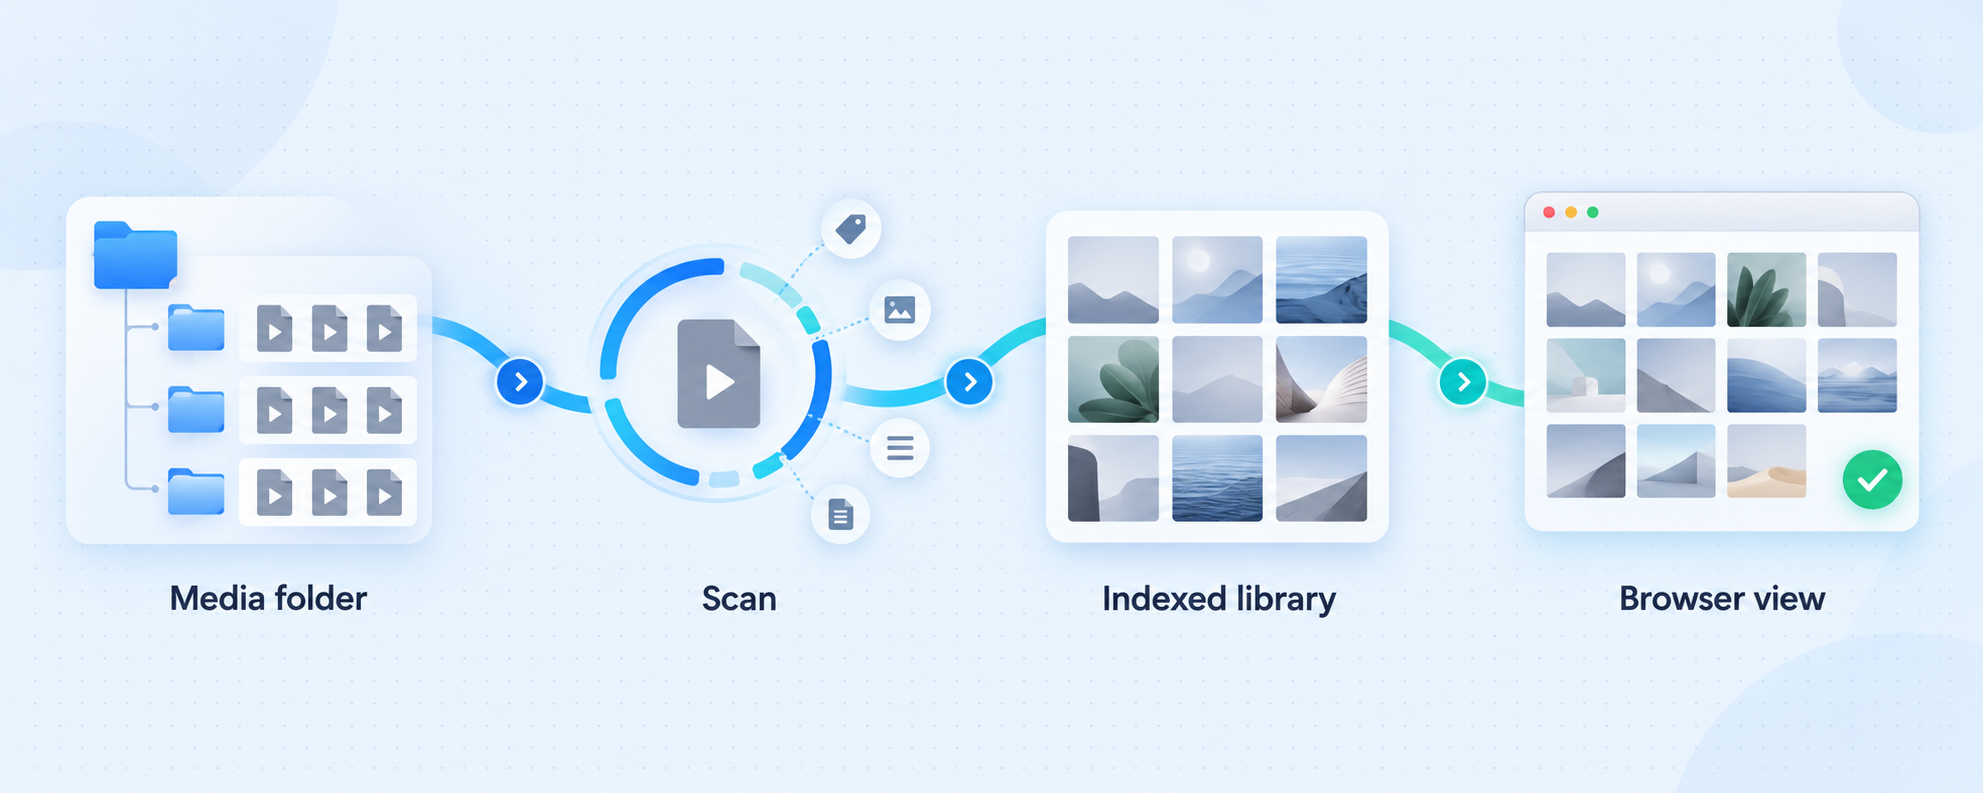
The first-run guide leads you through selecting a folder and generating the browser-based library view. Start with a path that OpenAver can read consistently. If the folder is on an external drive, connect and mount that drive before starting OpenAver. If it is a network share, confirm that the same user account can browse the share outside the application.
Choose a controlled library folder
Select a small existing folder during onboarding. A representative test set makes it easier to inspect imported metadata and detect naming or artwork issues.
Generate the library view
Use the onboarding action labeled Generate Webpage. OpenAver scans the selected source and imports compatible media, NFO, cover, fanart, and extra artwork information it recognizes.
Review missing information
Inspect the Scanner results for entries reported as missing NFO data or cover art. Do not start bulk enrichment until the imported entries and folder boundaries look correct.
Enrich only where needed
Use the enrichment action for incomplete records. Existing populated fields are intended to remain in place while missing information is added. Review a few results before running a large batch.
Inspect the Showcase
Open Showcase and confirm that covers, names, tags, people, and other imported fields correspond to the expected files.
OpenAver recognizes common artwork arrangements, including images with names matching the media item, -poster and -fanart suffixes, conventional filenames such as poster, fanart, cover, or folder, image paths referenced by NFO files, and stills stored under an extrafanart directory. A collection prepared by another compatible organizer can therefore often be imported without scraping everything again.
If you use Jellyfin, Emby, or Kodi, choose the relevant playback-software mode before organizing new files. OpenAver can produce NFO and artwork names for those applications, but their artwork conventions are not identical. For example, the project notes that a {stem}-fanart file is recognized by Jellyfin and Kodi but not by Emby. Test the generated layout with your media server before changing a large collection.
Read-only library sources
A source can be marked read-only when the original content should remain untouched, such as a NAS library or mounted cloud storage. For this mode, generated NFO files, artwork, and stills are written to a separate local output folder. OpenAver can create .strm pointer files for use by Jellyfin, Emby, or Kodi instead of copying the original videos.
Path-replacement rules are available for cases where OpenAver and the playback server see the same storage through different paths. Typical examples include different mount points, a Windows UNC path, a mapped drive, or a path crossing a Windows and Linux boundary. Treat these mappings carefully: confirm that a generated .strm file resolves correctly from the playback server before generating the rest of the library.
Verify the local installation before adding remote access
A successful launch does not prove that every storage path, metadata file, browser route, or network interface works. Complete local verification in layers. This gives you a known-good baseline and makes later tunnel troubleshooting much easier.
Confirm application startup
Close and reopen OpenAver. Verify that it starts without rerunning the installer and that your saved configuration remains available.
Confirm source availability
Check that every test source is reachable and that OpenAver does not report a disconnected NAS or external disk in its status area.
Inspect imported records
Compare several Showcase entries against their corresponding files, NFO metadata, and artwork. Confirm that aliases, tags, dates, titles, and images are associated with the correct item.
Test one incomplete record
Enrich a single item that is missing metadata or artwork. Verify the result and inspect which new files were created beside the media or in the configured read-only output.
Test server mode on the LAN
Enable server mode, note the exact address displayed by OpenAver, and open it from another device on the same Wi-Fi network. Do not proceed to Localtonet until this succeeds.
If the same-device desktop interface works but the second device cannot connect, the installation itself may be healthy. Investigate the displayed address, operating-system firewall prompts, guest-network isolation, and whether both devices are truly on the same LAN. Avoid changing several variables simultaneously.
The packaged application's exact hostname, bind address, and port are not established by the supplied documentation. Use the current address shown by OpenAver. Do not substitute the development example at 127.0.0.1:8000, and do not assume a port from another installation.
Routine library operations and safe maintenance
Scanning and enrichment
Run a scan after adding files outside OpenAver or reconnecting storage that was unavailable. Scanning imports what is already present and identifies missing pieces. Enrichment is a separate network-backed operation that looks for missing metadata or artwork. Keeping these operations conceptually separate makes it easier to understand why a title appears in the library but still lacks a cover or description.
Metadata providers do not all expose the same fields. A successful lookup may therefore produce a title and cover without a plot or rating. A missing field does not necessarily mean the installation is broken. Review provider results and avoid repeatedly overwriting accurate hand-maintained metadata just to fill an optional field.
Organizing new files
The Search page accepts new files or folders, identifies likely titles, searches supported metadata sources, and lets you preview the proposed information. The explicit Organize action can then rename files, create folders, write NFO data, download artwork, and move content according to your configured rules.
Treat the preview as a required review step. Check identifiers, title, destination, artwork, and metadata source before confirming organization. This matters particularly for partial identifiers or visually similar search results. A recent OpenAver release changed scheduled organization to use an exact single-title lookup and leave the file in place if no exact result is found, but manual review remains the safest approach.
Scheduled organization
OpenAver can designate a completed-download folder and run an automated sequence approximately every 12 hours. It can also run that sequence immediately on request. Automation is useful only after the naming, destination, and exact-match behavior have been tested manually. Start with a monitored folder containing copies or replaceable test data, then inspect the output before relying on unattended processing.
Updating OpenAver
The scripted installation path is designed to download the latest release while preserving settings during upgrades. Even so, back up configuration and custom metadata before a significant update. Read the release description for storage, organization, and NFO changes that affect your workflow, then retest startup, scanning, and one sample organization.
If you use a manually extracted ZIP, do not assume that replacing files has the same update behavior as the installer. Follow the instructions packaged with the new release and preserve your current installation until the updated copy has been verified.
Enable OpenAver server mode for browser access
OpenAver's server mode makes its browser interface available to devices on the same Wi-Fi network. Enable that mode in the application's settings and read the displayed address. The interface is designed for touch use as well as desktop browsing, so a phone or tablet can navigate the collection after opening that address.
Server mode is different from the default single-computer mode. When you no longer need network access, switch back to standalone mode to stop exposing the interface to other local devices. This is a useful operational control even before Localtonet is involved.
Open OpenAver settings
Locate the operating mode control and switch from standalone use to server mode.
Set the available password protection
Configure a strong, unique password before allowing broader network access. Do not reuse a password from another account or service.
Copy the displayed browser address
Record the full local URL, including its scheme, hostname or IP address, and port. These runtime values are authoritative for your installation.
Test from another local device
Connect a phone, tablet, or second computer to the same trusted network and open the displayed URL. Authenticate if prompted and browse several library pages.
Keep the full URL for testing, but separate it into the local target host and port when configuring Localtonet. For example, if OpenAver displays an address in the form http://host:port, the host portion becomes the local IP or hostname and the numeric port becomes the local target port. Use your actual values rather than copying placeholder text.
Understanding the AI API port
OpenAver also exposes a capabilities manifest for AI integrations. Its documentation shows the route in this form:
curl http://localhost:<port>/api/capabilities
Replace <port> only with the value displayed under Settings, then AI API. This command is appropriate for a same-computer verification of that API. It does not identify the browser server's port, and it is not evidence that the API is safe to publish. Keep the API local unless a specific integration requires remote access and you have evaluated its authentication and available operations.
Expose the working OpenAver browser interface with Localtonet
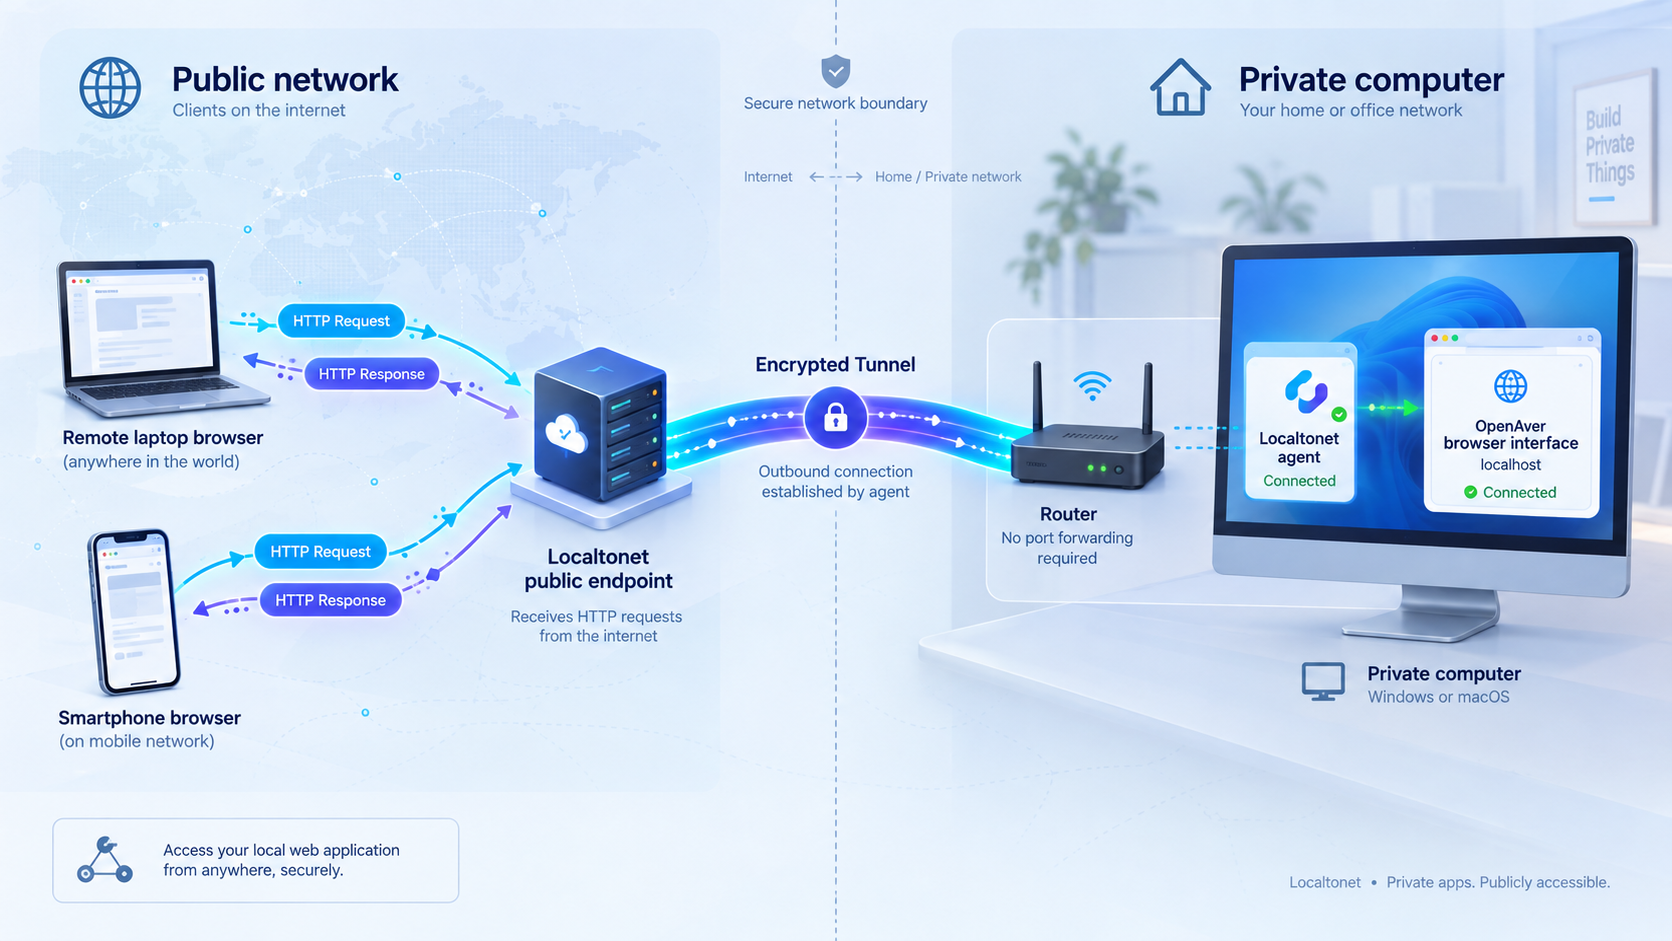
Once OpenAver works from another device on your LAN, an HTTP tunnel can provide a public HTTPS address for that same browser service. The Localtonet client establishes an outbound connection to one of our relay servers, so you do not need inbound router port forwarding, a public IP address, firewall rule changes for internet ingress, or a VPN setup.
Run our client on the OpenAver computer when possible. If it runs on another device, that device must be able to reach the OpenAver host and port over the local network. A tunnel cannot repair an unreachable local target, so repeat the LAN test from the machine that will run the Localtonet client if the two applications are on different devices.
Install and run the Localtonet client
Install our current client for the operating system on the device that can reach OpenAver. Keep OpenAver running in server mode while testing the tunnel.
Authenticate or select the client device
Use the device-specific auth token associated with that client. Treat the token as a secret, never paste it into public instructions, and never reuse a token copied from another device.
Select an available relay server
Choose a server or region from the values currently available in the Localtonet dashboard. Availability can vary, so do not hardcode a server code from an old guide.
Create an HTTP tunnel to OpenAver
Select the HTTP tunnel type and enter the local IP address and port derived from the URL displayed by OpenAver. Choose the available process type appropriate for your account, such as a random subdomain, supported custom subdomain, or custom domain.
Start the tunnel
Creating a tunnel does not start it. Use the Start button and wait for both the selected Localtonet client and tunnel to be connected.
Test the assigned public address
Open the assigned public HTTPS URL from a network outside your home or office LAN. Confirm that the OpenAver password prompt and expected browser interface appear, then stop or delete the tunnel when remote access is no longer required.
For the current dashboard sequence and field descriptions, consult our HTTP tunnel documentation. The documentation is particularly important if you want a custom domain, because exact DNS requirements should be taken from the current configuration flow rather than assumed.
The public address works only while the selected Localtonet client is connected, the tunnel is running, OpenAver is running in server mode, and the configured local target remains reachable. Closing OpenAver, changing its port, disconnecting the storage host, stopping the tunnel, or shutting down the client device can interrupt access.
Security practices for a remotely accessible media library
A same-Wi-Fi interface and a public internet URL have very different exposure levels. A Localtonet HTTP tunnel makes the selected service reachable through its assigned public address. It does not remove the need for application authentication, careful content handling, and deliberate lifecycle management.
Also consider what information the browser interface reveals. Filenames, folder-derived titles, tags, artwork, and personal catalog choices can be sensitive even when the underlying media file is not directly downloadable. Review the interface from an unauthenticated browser session and from a device outside your local network.
Confirm OpenAver's password behavior before sharing the public URL. If the expected authentication prompt does not appear, stop the tunnel and correct the application configuration. A hard-to-guess URL is not a substitute for authentication.
Troubleshooting installation, scanning, and remote access
OpenAver does not start after installation
Confirm that the computer matches the supported packaged target. Windows must be Windows 10 or 11 on x64. The packaged macOS route requires Apple silicon. If you used a ZIP, follow the security-unblocking instructions bundled with that exact archive. If you used the scripted installer, rerun it only after checking whether the first run completed and whether security software quarantined part of the application.
The scanner cannot reach a folder
Open the folder directly under the same operating-system account. Reconnect an external disk, remount the NAS share, and verify that its path has not changed. A mapped Windows drive can disappear in a different login context, while a UNC share can require an active authenticated session. OpenAver reports unreachable library locations in its status area, which can help identify the affected source.
Existing NFO files or artwork are not imported
Compare the files against the recognized arrangements. Check for a matching base name, supported poster or fanart suffix, conventional artwork filename, valid NFO image reference, or an expected extrafanart directory. Test one simplified item with its media, NFO, and artwork together. This separates naming problems from folder-permission or parsing problems.
Enrichment succeeds but some fields remain empty
Providers offer different fields, and some do not supply plot or rating information. A source may return usable artwork and identity data without every optional field. Avoid interpreting every empty value as a failed request. Preview another source where available, but preserve accurate existing metadata instead of replacing it indiscriminately.
OpenAver works on the host but not on another Wi-Fi device
Verify that server mode is enabled and use the exact displayed URL. Check whether the second device is on a guest network that blocks peer traffic. Review operating-system firewall prompts and confirm that the OpenAver process is allowed on the intended trusted network profile. Test the host address from the Localtonet client device as well.
The Localtonet public URL shows a connection error
Work backward through the connection chain:
- Confirm that OpenAver is running in server mode.
- Open the displayed local URL from the machine running our client.
- Compare the tunnel's local host and port with the current OpenAver address.
- Confirm that the selected Localtonet device is connected.
- Confirm that the tunnel was started rather than merely created.
- Retest the public URL after correcting one issue at a time.
If OpenAver selected a different port after an update or configuration change, update the tunnel target to match. Never replace the packaged address with the Uvicorn development example unless you are actually running that source-development configuration.
The public page opens but authentication is missing
Stop the tunnel immediately. Return to OpenAver settings, verify server-mode password protection, and test it in a private browser session on the LAN. Restart the tunnel only after the expected login behavior is confirmed. Browser cookies can make an authenticated session appear unprotected, so use a fresh private window for testing.
The AI capabilities request fails
Check the port displayed specifically in Settings under AI API. Do not reuse the browser server port unless OpenAver itself shows that value for the API. Run the request on the OpenAver host first. A failed API request does not necessarily indicate a problem with Showcase or server-mode browser access because these are separate functions.
Frequently asked questions
Does OpenAver require Docker?
No. The documented Windows and Apple-silicon macOS installation paths use packaged desktop builds and do not require Docker. A source-development path also exists, but it is separate from the normal desktop installation.
Does OpenAver support Intel Macs?
The documented packaged macOS build is arm64 for Apple-silicon Macs, identified as M1 or later. The available project evidence does not establish an Intel macOS packaged build, so do not assume that the normal installer supports Intel hardware.
Will scanning rename or move my existing videos?
A normal scan is intended to read the source without changing the video files. Enrichment can add missing NFO or artwork files. Renaming and moving are associated with the explicit Organize action, so review its destination and naming preview before confirming it.
What port does the packaged OpenAver application use?
Use the address and port displayed by your running OpenAver installation. The exact packaged-app default is not established by the supplied documentation. The development example at 127.0.0.1:8000 must not be assumed to apply to the packaged application.
Should I tunnel OpenAver's browser interface or its AI API?
For remote library browsing, target the browser address displayed by server mode. The AI API is a separate integration surface with a configurable port shown under Settings, then AI API. Keep it local unless you have a specific remote integration requirement and have evaluated its access controls.
Do I need router port forwarding for remote OpenAver access?
No. With Localtonet, our client establishes an outbound connection to a relay server and provides a public URL for the configured local HTTP target. You do not need inbound router port forwarding or a public IP address.
Does creating a Localtonet tunnel make it active immediately?
No. Creating the configuration does not start it. The selected client must be connected and you must use the Start button. The public address remains usable only while the tunnel is running and the local OpenAver target remains reachable.
Can the Localtonet client run on a different computer?
Yes, provided that computer can reach the OpenAver server address and port over the local network. Running both applications on the same host is usually simpler because it removes one local network hop, but it is not required by the tunneling model.
Connect your verified OpenAver library with Localtonet
Finish the OpenAver installation, confirm its server-mode address on your local network, protect the interface with a strong password, and then create an HTTP tunnel to that exact host and port. Keep the tunnel stopped whenever remote library access is not needed.
Get Started Free →